
Magic Content
Learn how to use Magic Content AI in SmartReach to create personalized cold emails. Generate hyper-personalized content that boosts response rates.
What is Magic Content and How It Helps
Magic Content is an AI-powered tool in SmartReach.io that creates personalized cold emails for your outreach campaigns.
It analyzes your prospect data, product details, and campaign goals to generate unique, relevant emails that significantly boost response rates compared to standard templates.
Note: For best results, enrich your prospect data using tools like Clay.com, Persana, or Builtwith. Examples of enriched data include recent events attended, technology stack, company growth signals, latest feature releases, promotions, or new job announcements.
Key benefits include:
- Hyper-personalized content for each prospect
- Dynamic subject lines and email content
- Context-aware follow-ups that reference previous messages
- Better engagement through relevant messaging
Plan Availability
Magic Content is available only on Plus, Pro, and Scale plans. If you don't see this option, you may need to upgrade your plan.
How It Works
Magic Content works by combining three key elements to create personalized emails:
- Your prospect's data (including enriched data like recent LinkedIn posts, company news, job changes, revenue information)
- Your campaign context (industry, goals, target audience)
- Email step content (your messaging framework and call-to-action)
- The AI then generates hyper-personalized content for each email step, written with cold email best practices in mind.
Step-by-Step Guide to Using Magic Content
Step 1: Start a New Campaign
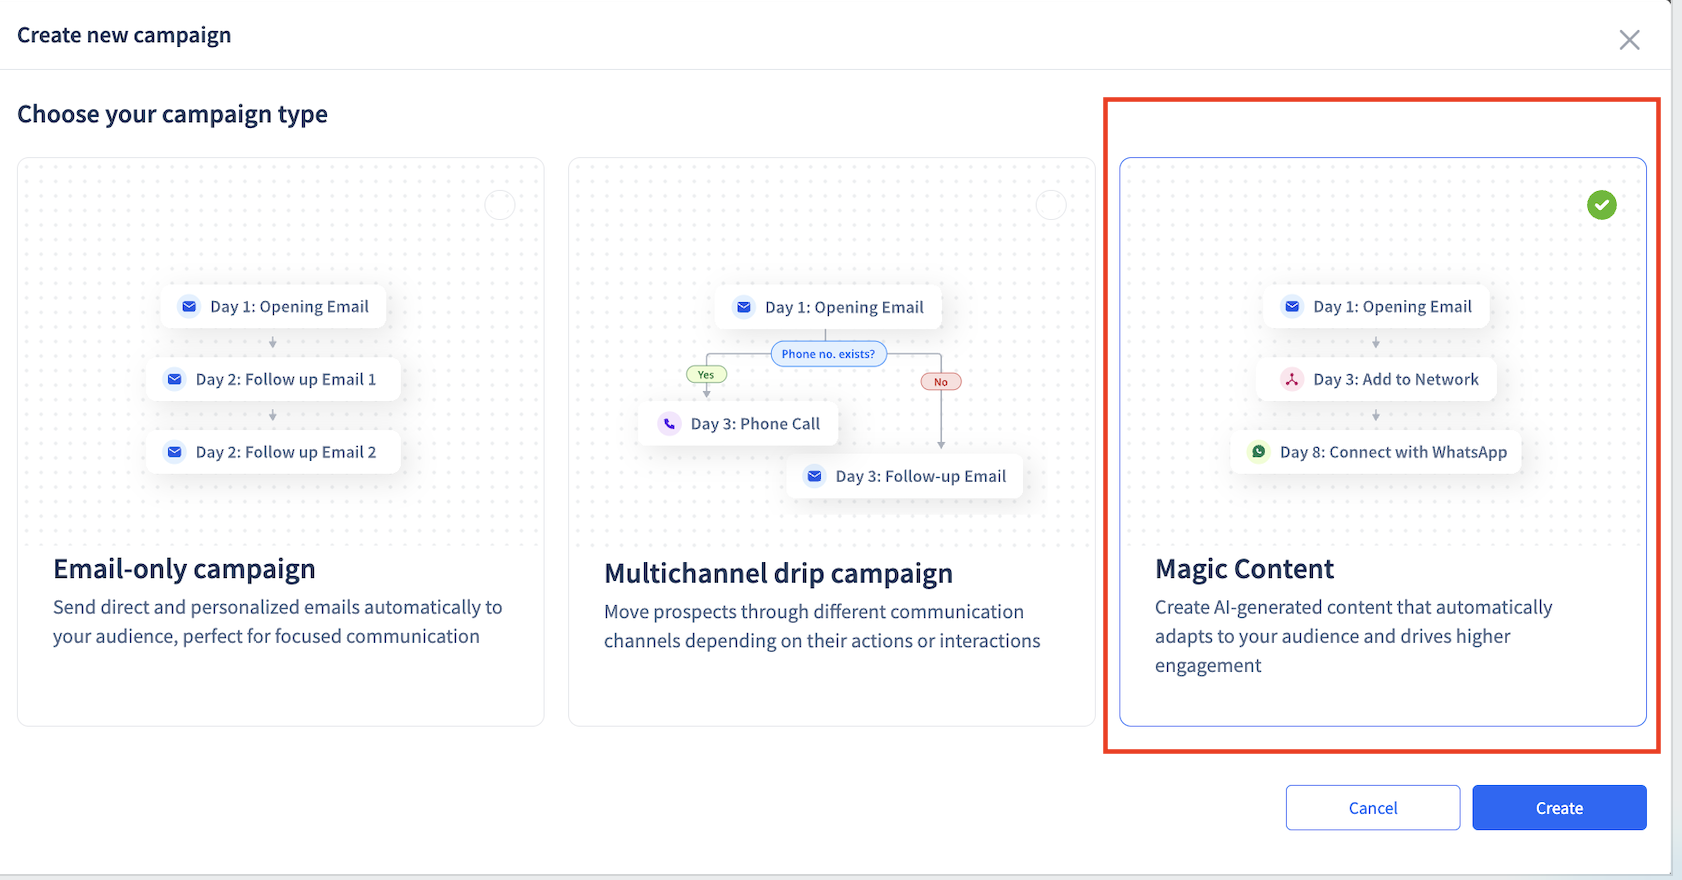
- Navigate to the Campaigns section from the left sidebar
- Click Create Campaign
- Select the Magic Content option
- Add a relevant name to your campaign
Step 2 Add Your Prospects
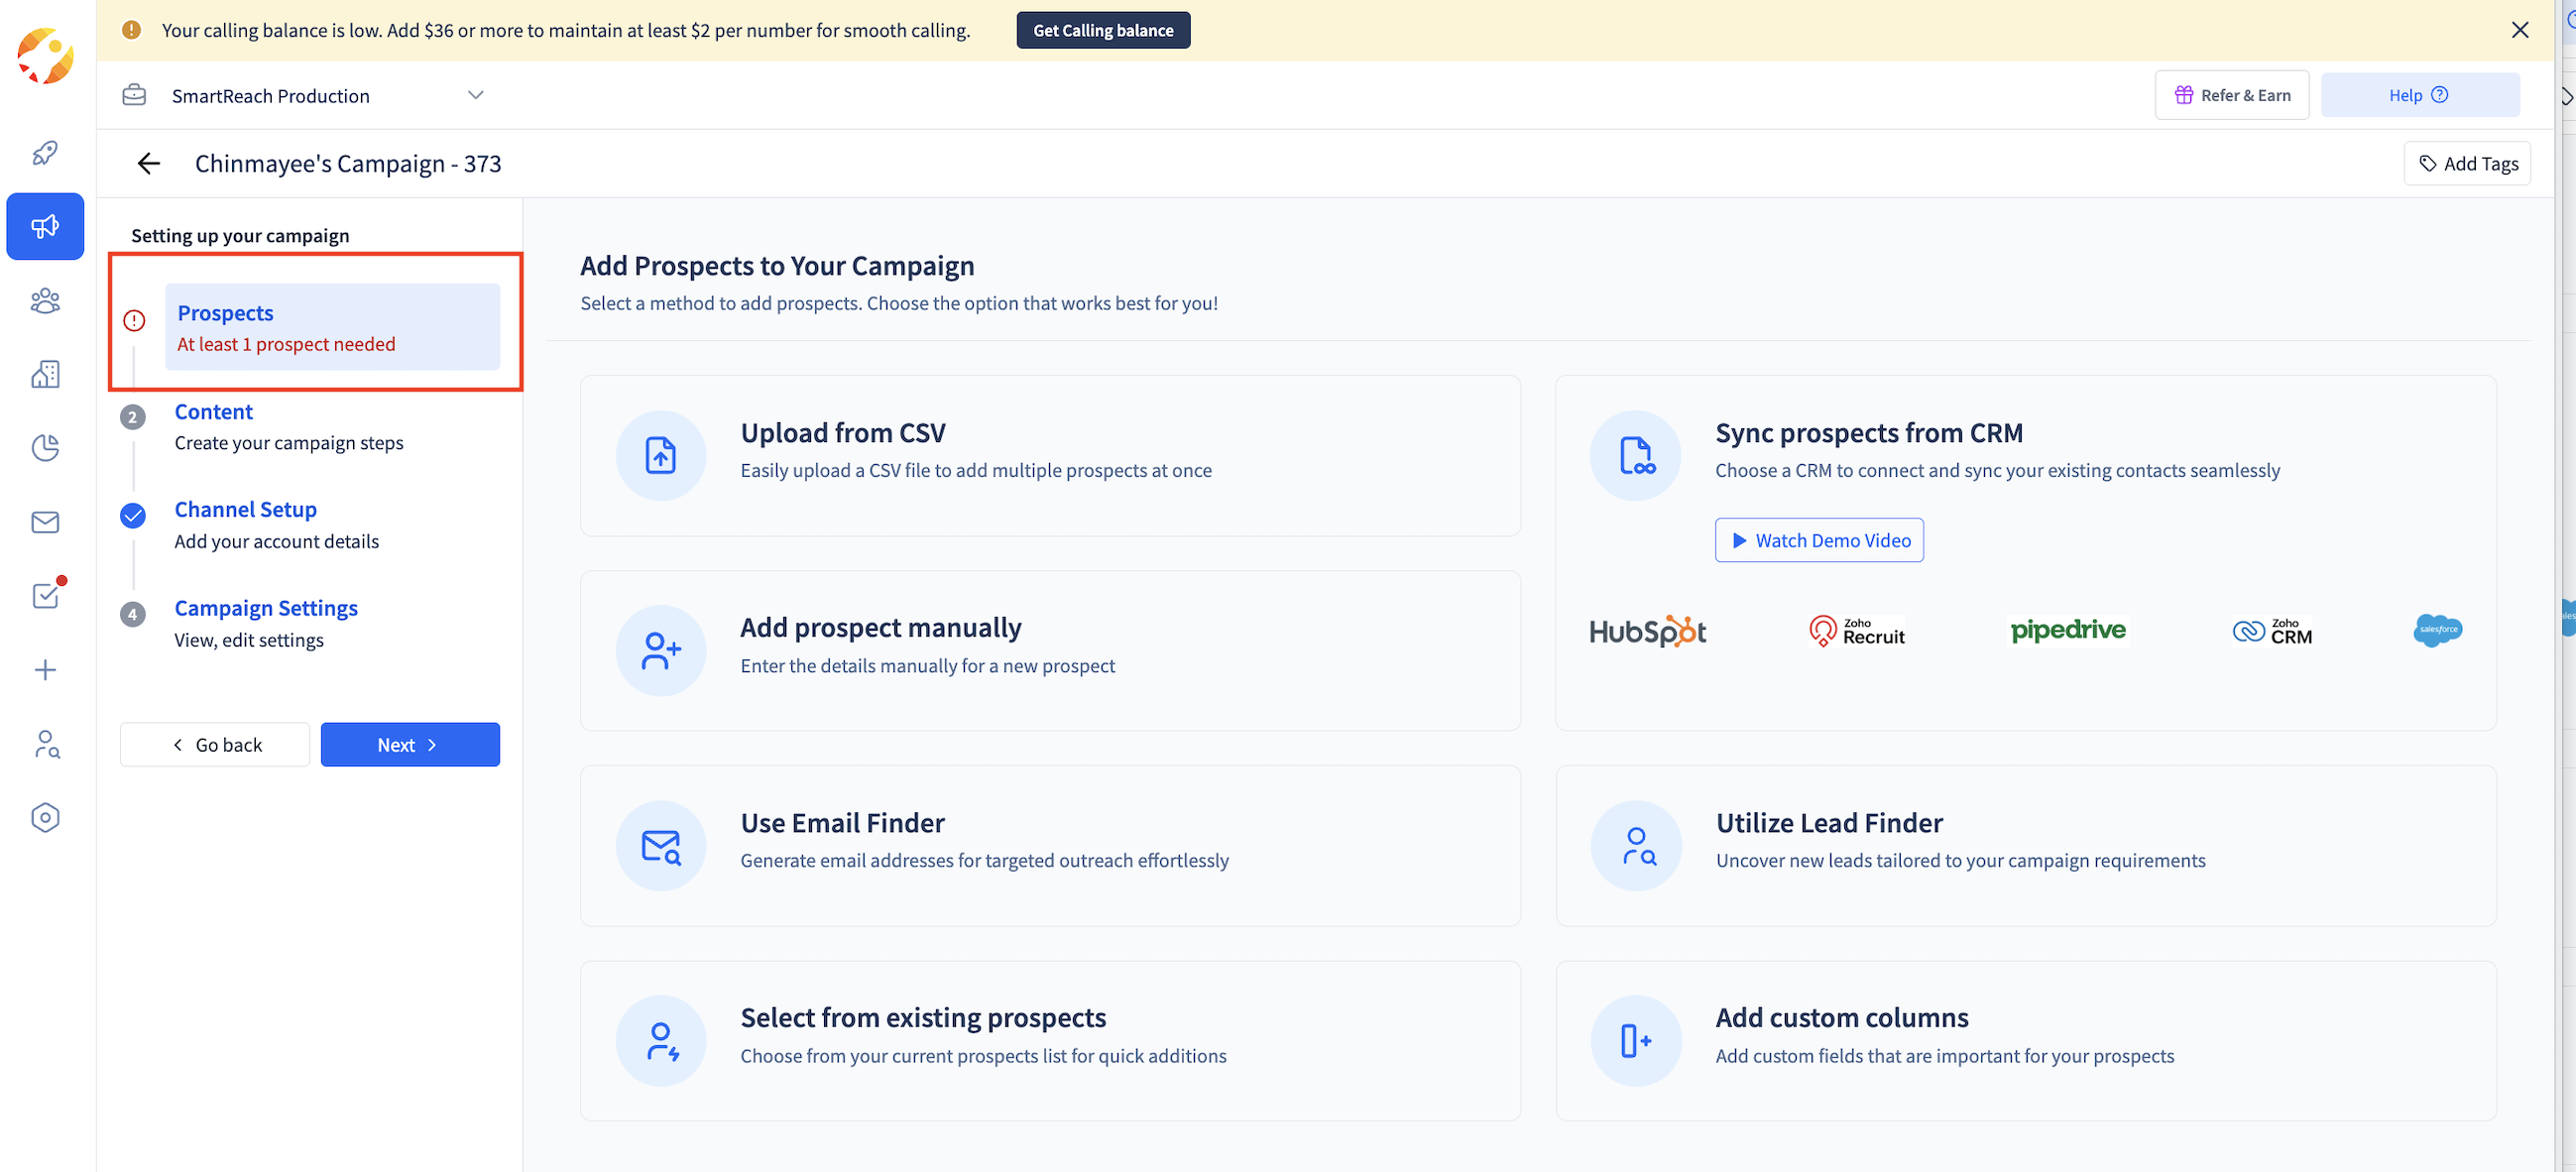
- Import your prospects from a CSV file or add them manually
- For best results, enrich your data using tools like Clay.com or Persana
Step 3: Select Magic Content

- In the Content step, click Write with AI
Step 4: Set Campaign Content
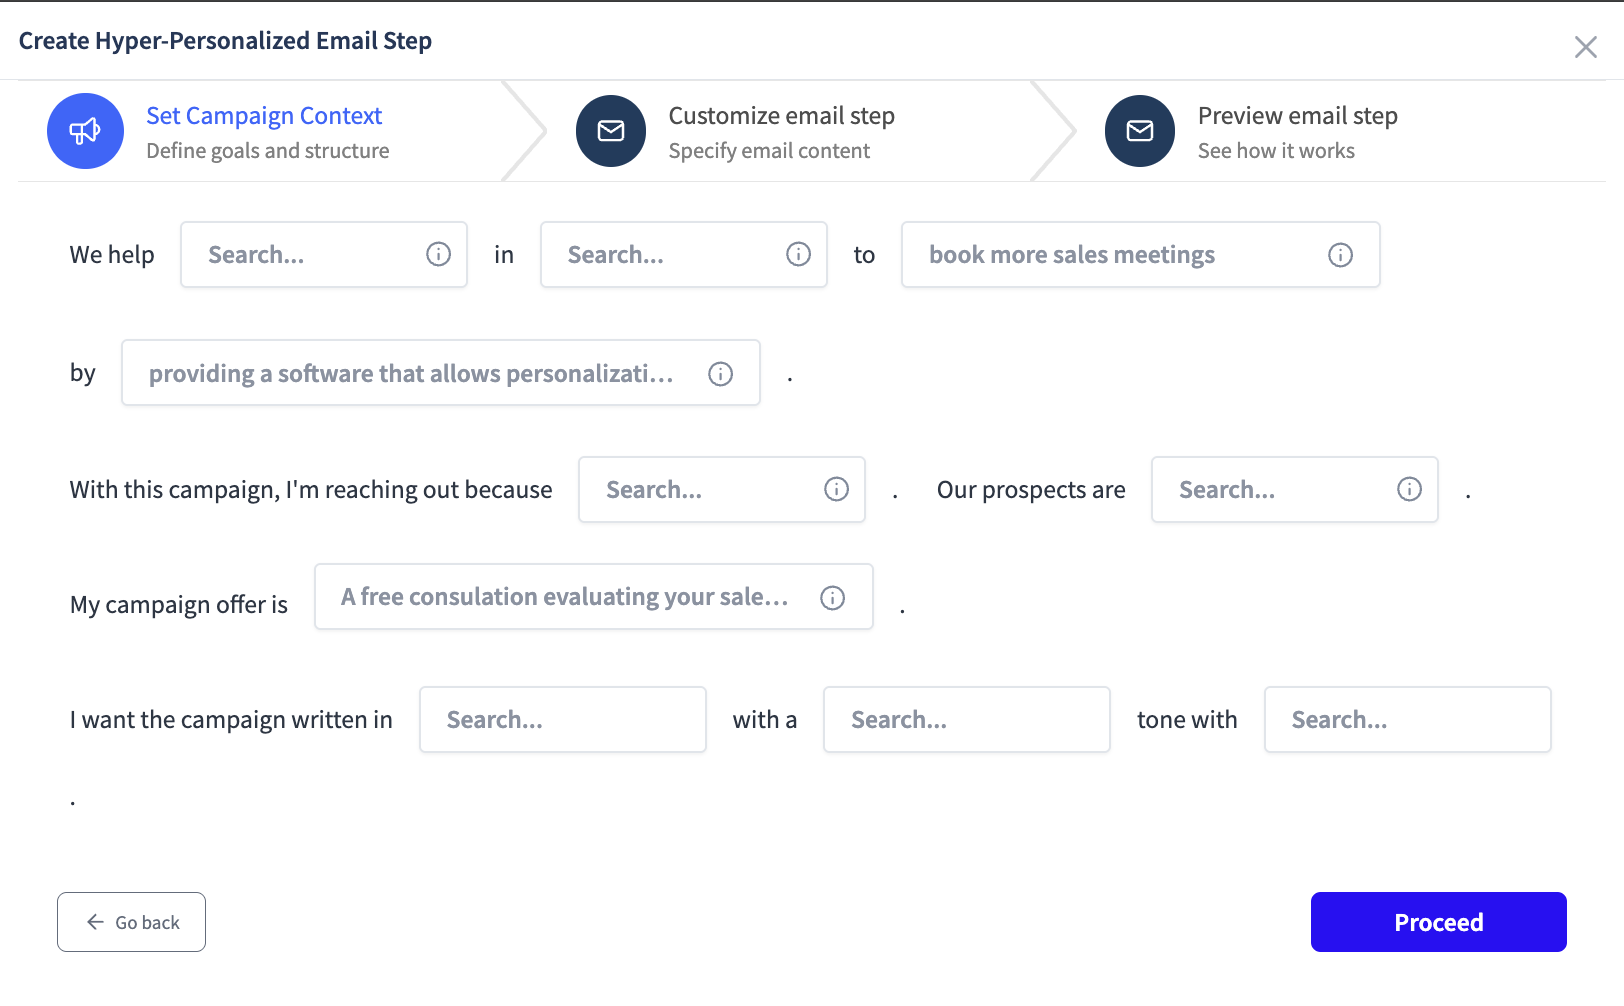
Fill out the campaign context form with details about:
• Who you help (e.g., sales teams, recruiters)
• What industry they're from (e.g., B2B, SaaS, healthcare)
• What you help them achieve (e.g., increase meeting bookings)
• Your solution (e.g., automated outreach tool, CRM)
• Who you're reaching out to (e.g., CEO, Head of Sales)
• Why you're reaching out (e.g., sales, partnerships, hiring)
• Preferred language and tone (e.g., English, conversational)
• Number of follow-up steps
• Any additional context (company name, specific details)
Step 5: Customize Email Content
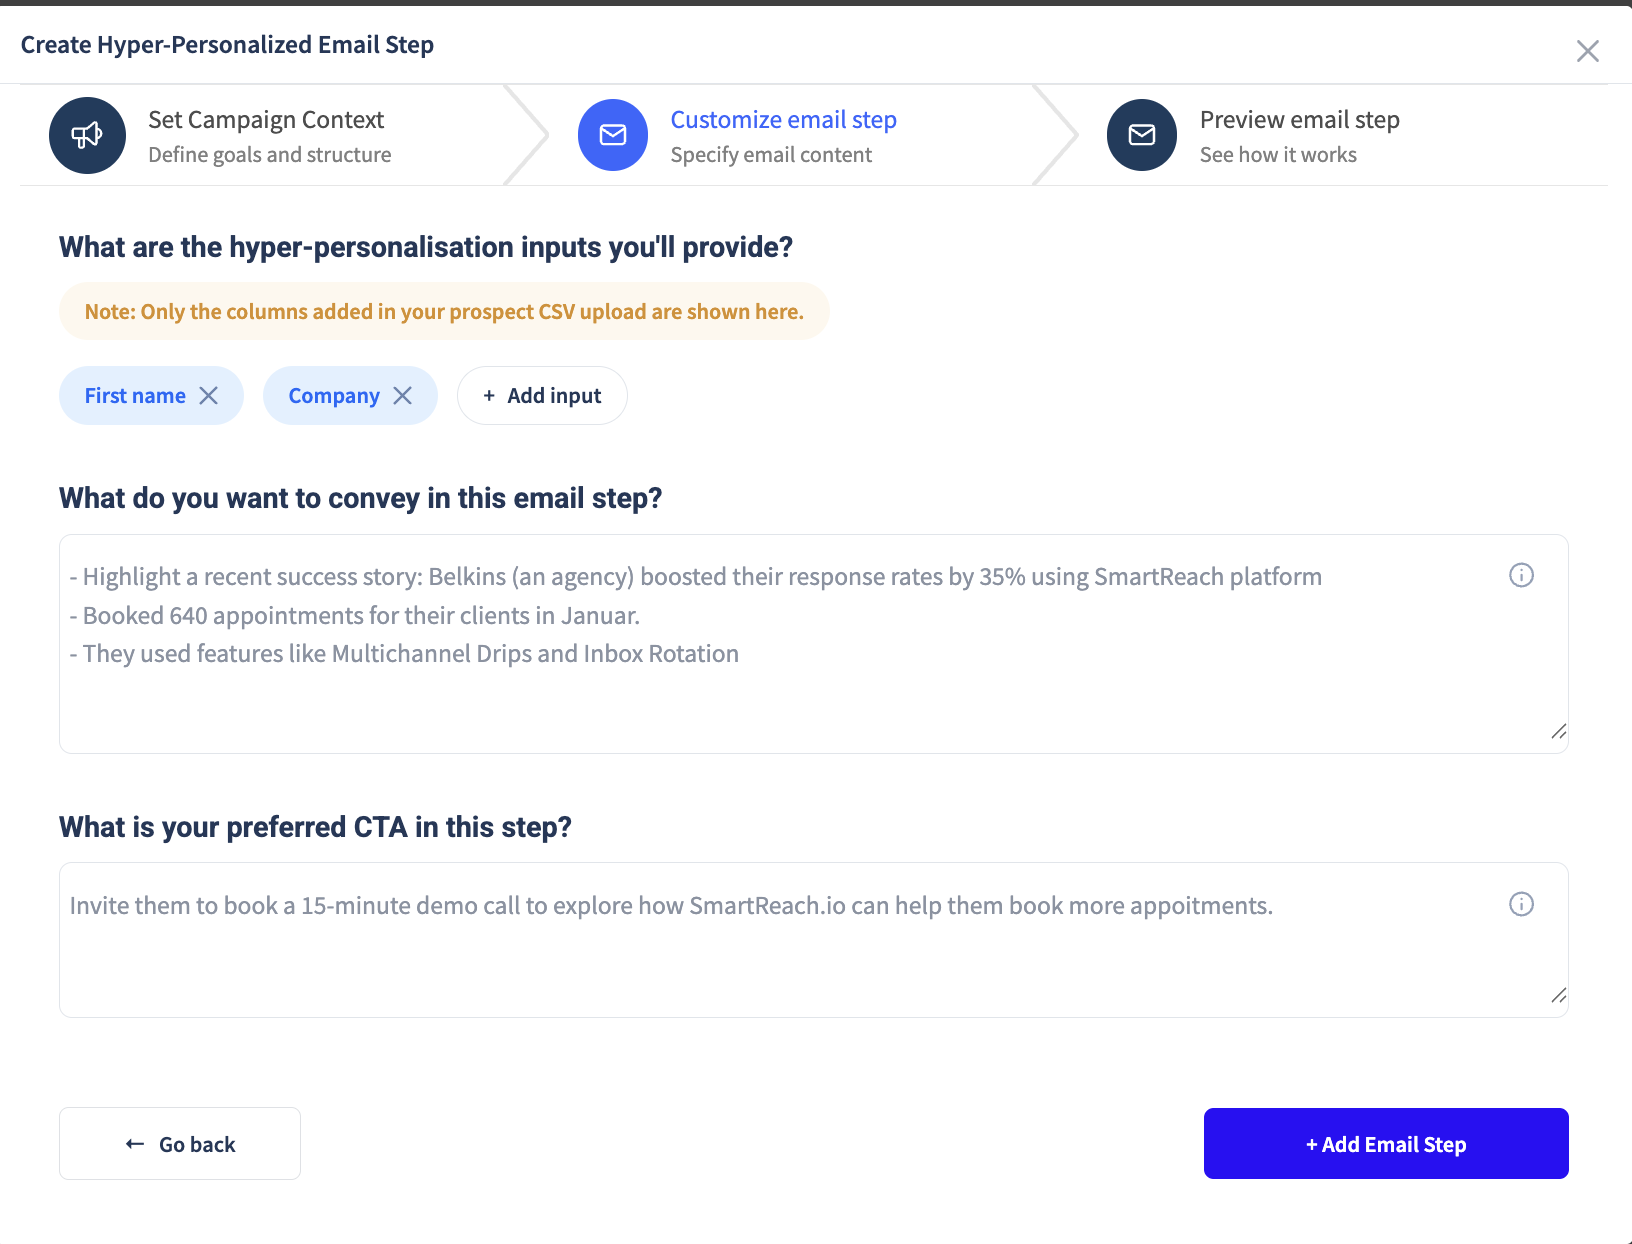
For each email step:
- Set wait time (e.g., 3 day after previous step)
- Select personalization inputs (choose all enriched datasets + basic info like name, company, designation)
- Write a rough idea of what you want to convey in that step
- Add a clear Call to Action (CTA)
Note: This is one step where you need to be as detailed as possible. Detailing here will help AI write better emails.
Step 6: Preview and Finalize Step
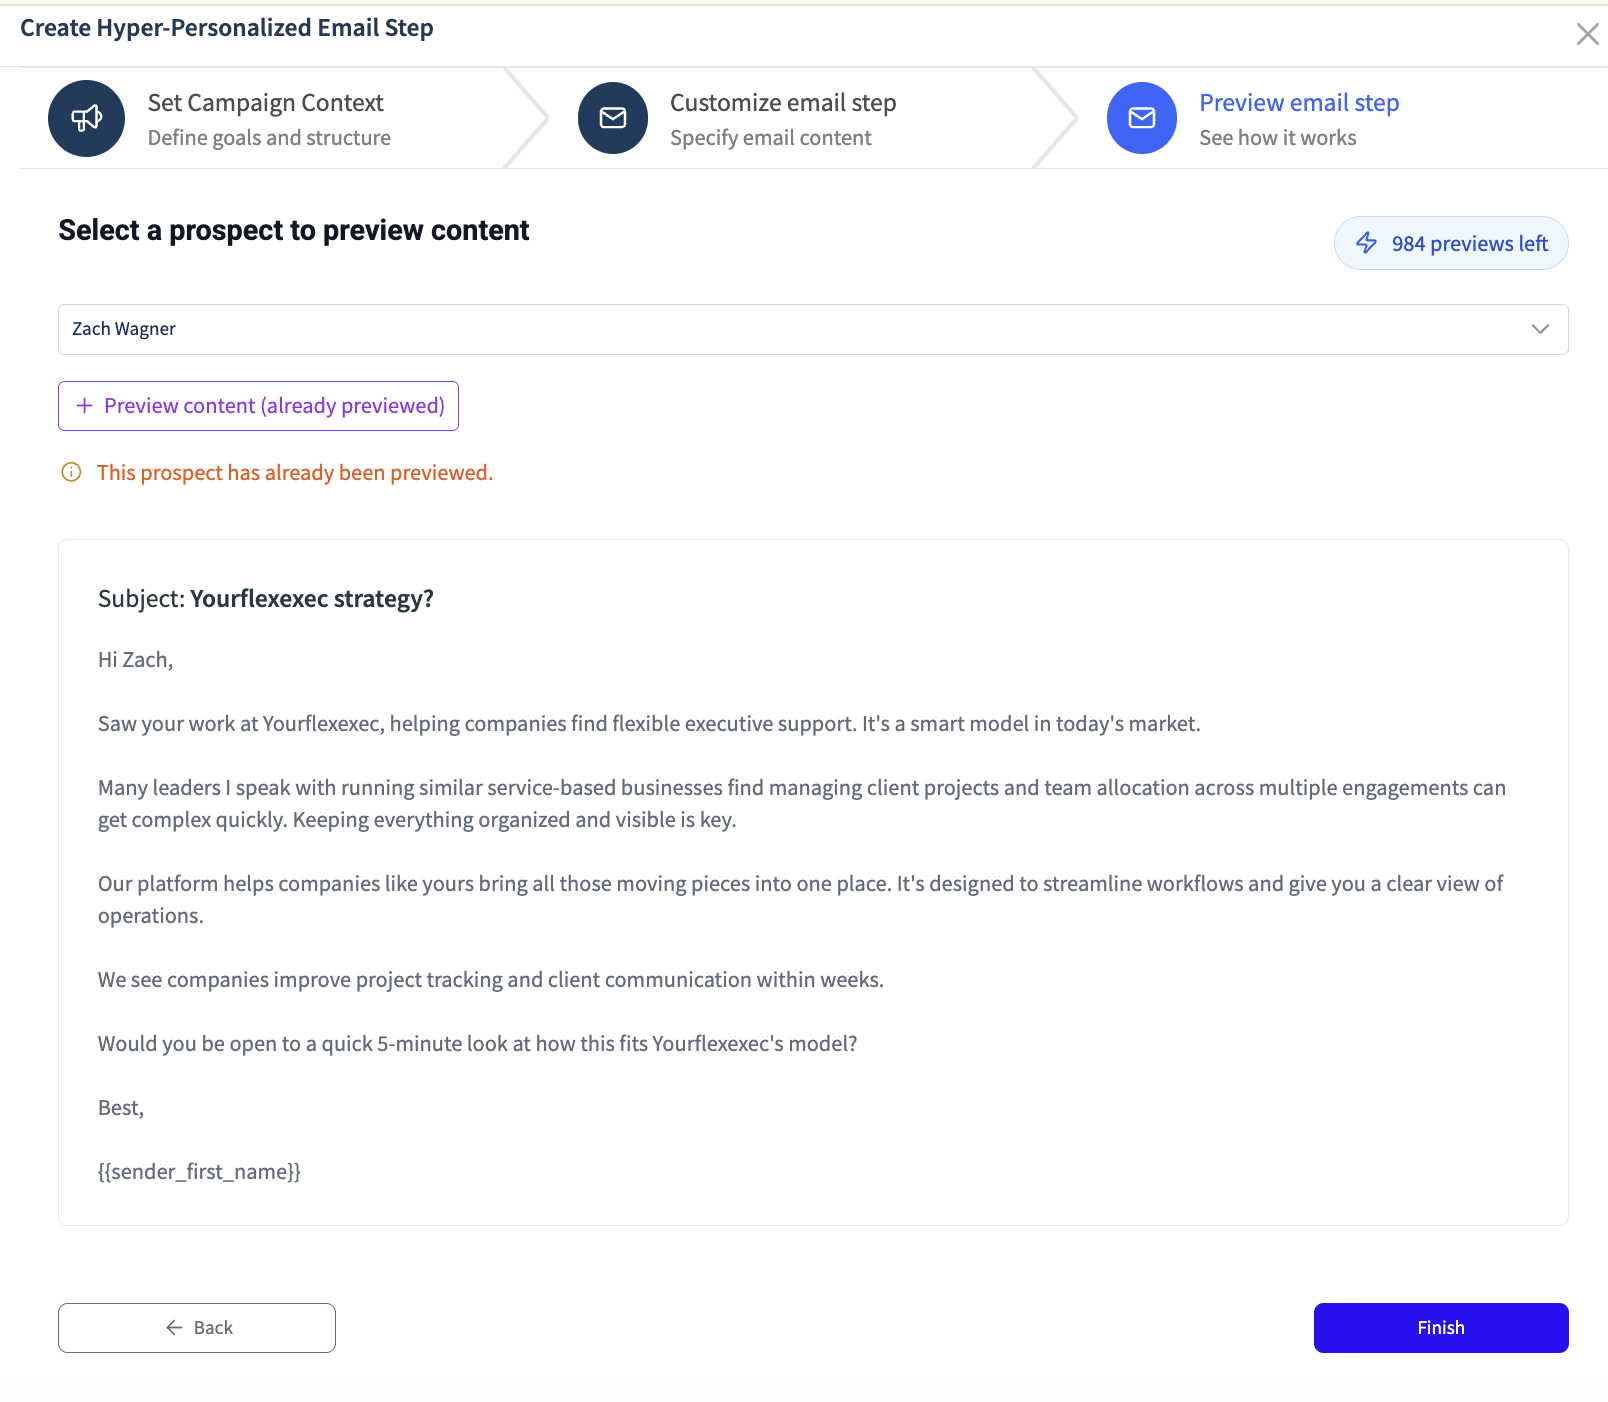
- Review AI-generated email content
- Use the Preview Content tab to see how it looks for a specific prospect
- Click on Finish
Note: You cannot edit email content from the preview tab. Content editing is available in co-pilot mode through the approval section.
Step 7: Configure Campaign Settings
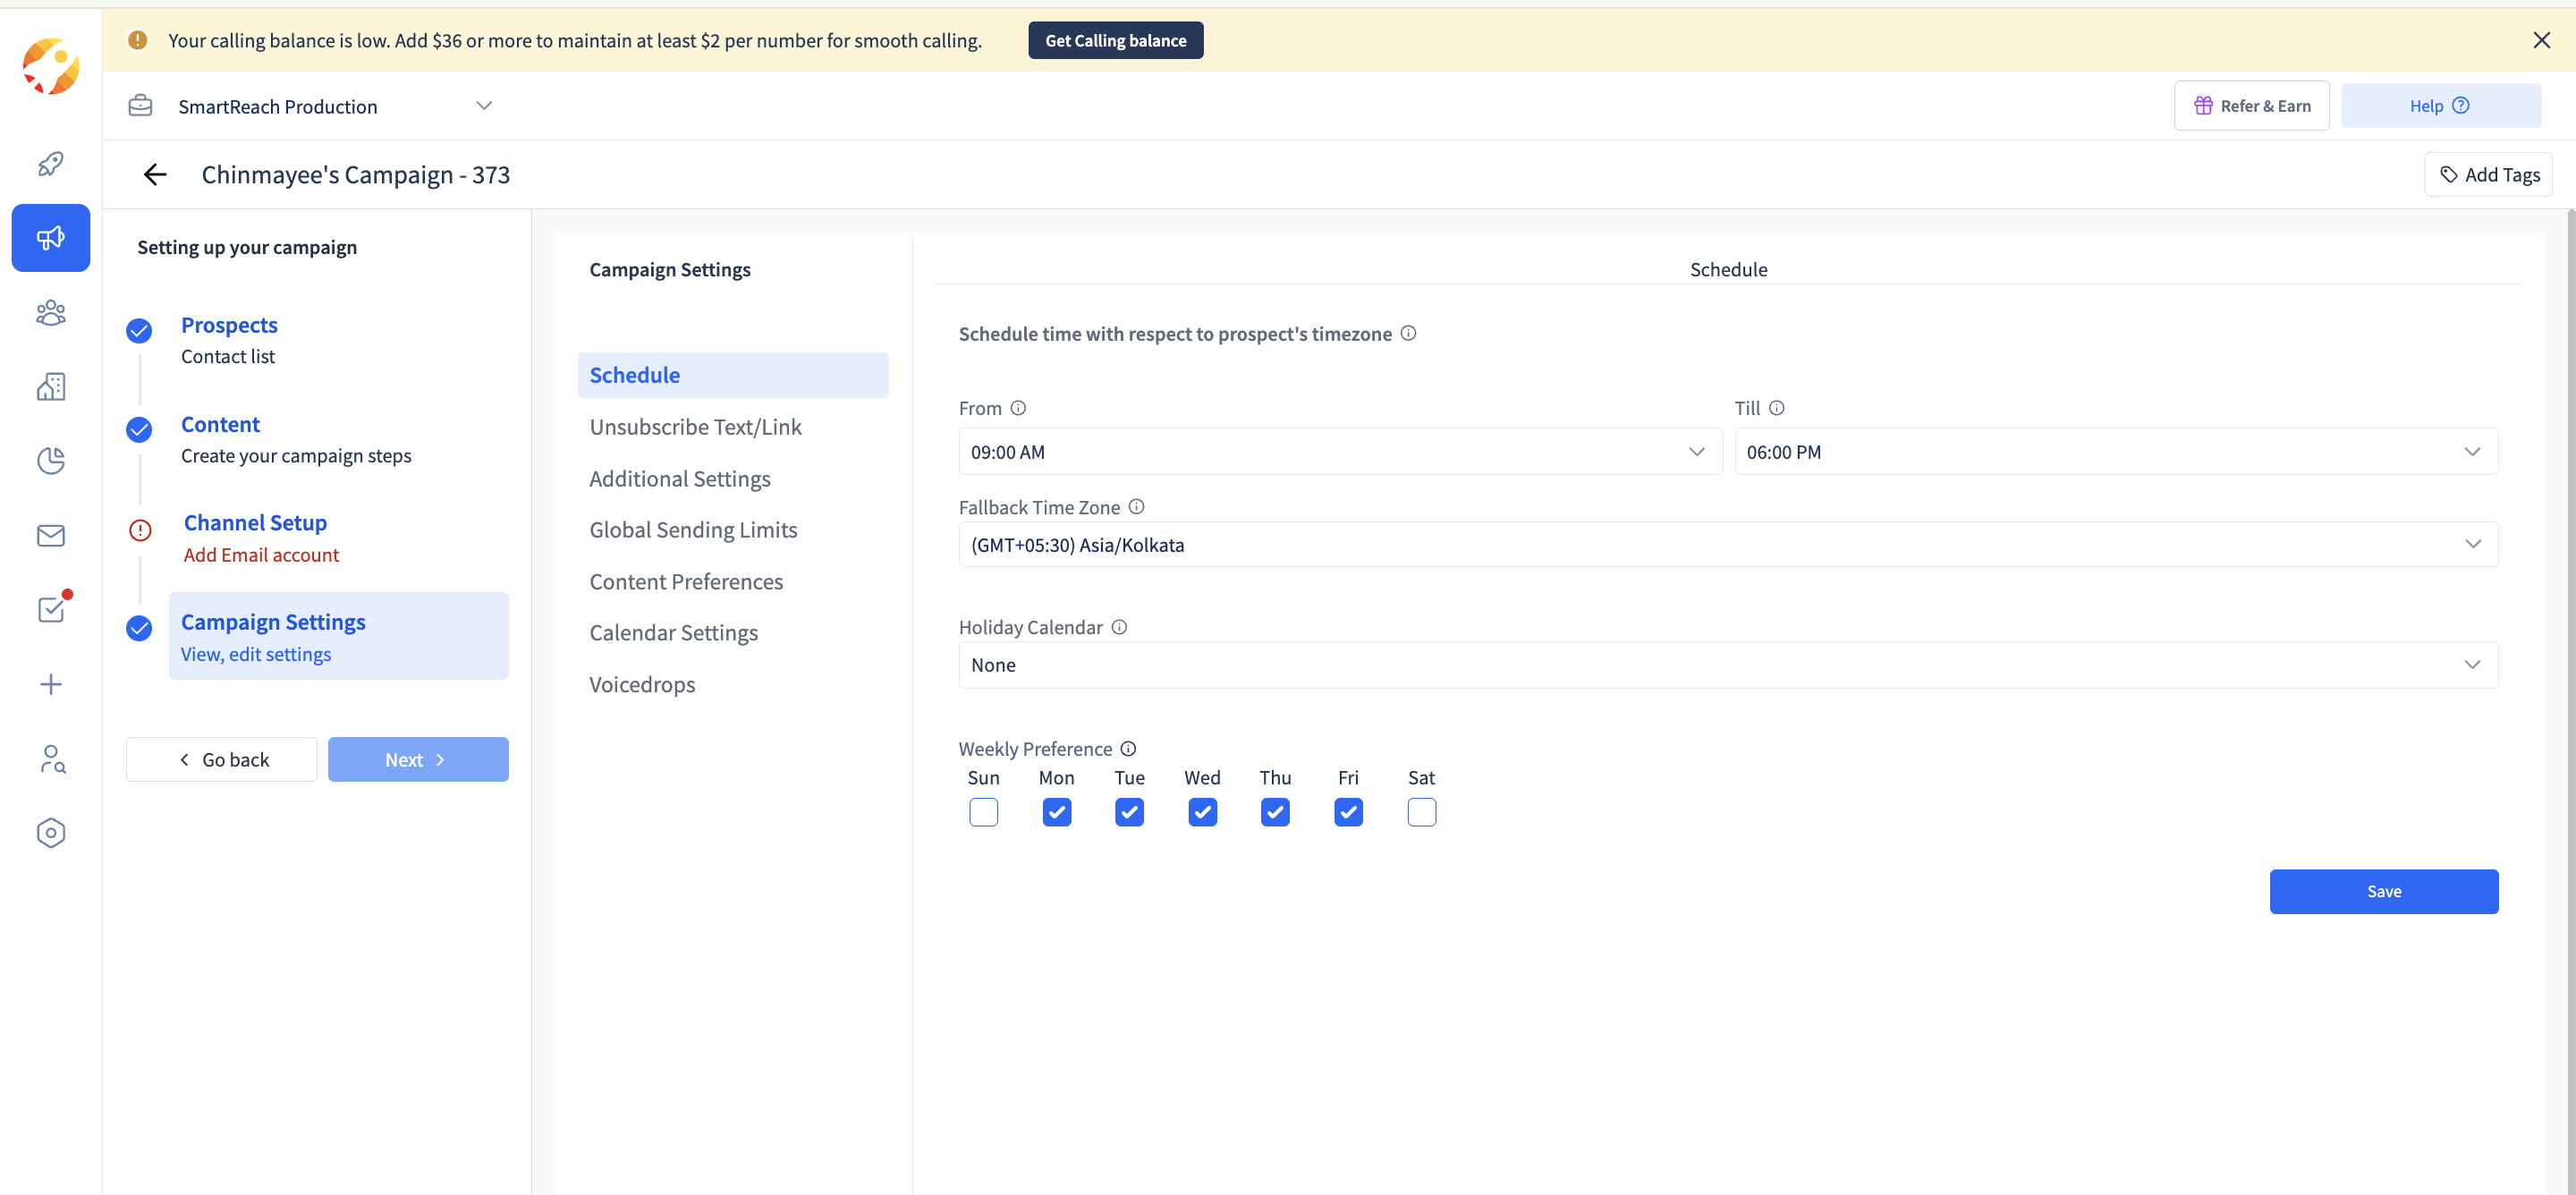
Set your sending schedule, timezone, and other preferences according to your outreach strategy.
Step 8: Choose Launch Mode After Starting The Campaign
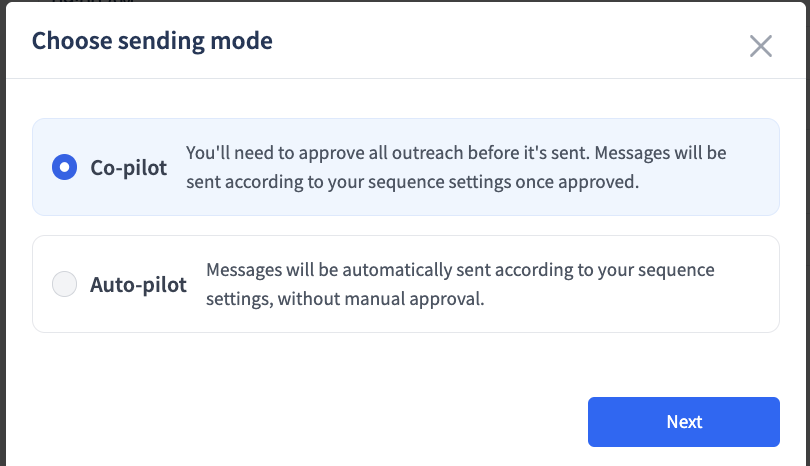
Once you click start campaign, you will get an option to select a preferred launch mode:
Automated Mode
- AI generates and sends emails without manual review
- Best for high-volume outreach and experienced users
Co-piloted Mode
- Review and approve each email before sending
- Best for testing new messaging or first-time users
- Allows editing content before sending
Note: Once you have gained confidence in the AI Magic Content output, you can switch from a co-pilot mode to a fully automated mode even when a campaign is live.
Updated 12 months ago