
From CSV
Learn how to upload prospects using CSV files in SmartReach. Complete guide with field mapping, duplicate handling, and troubleshooting tips.
How to upload prospects using CSV
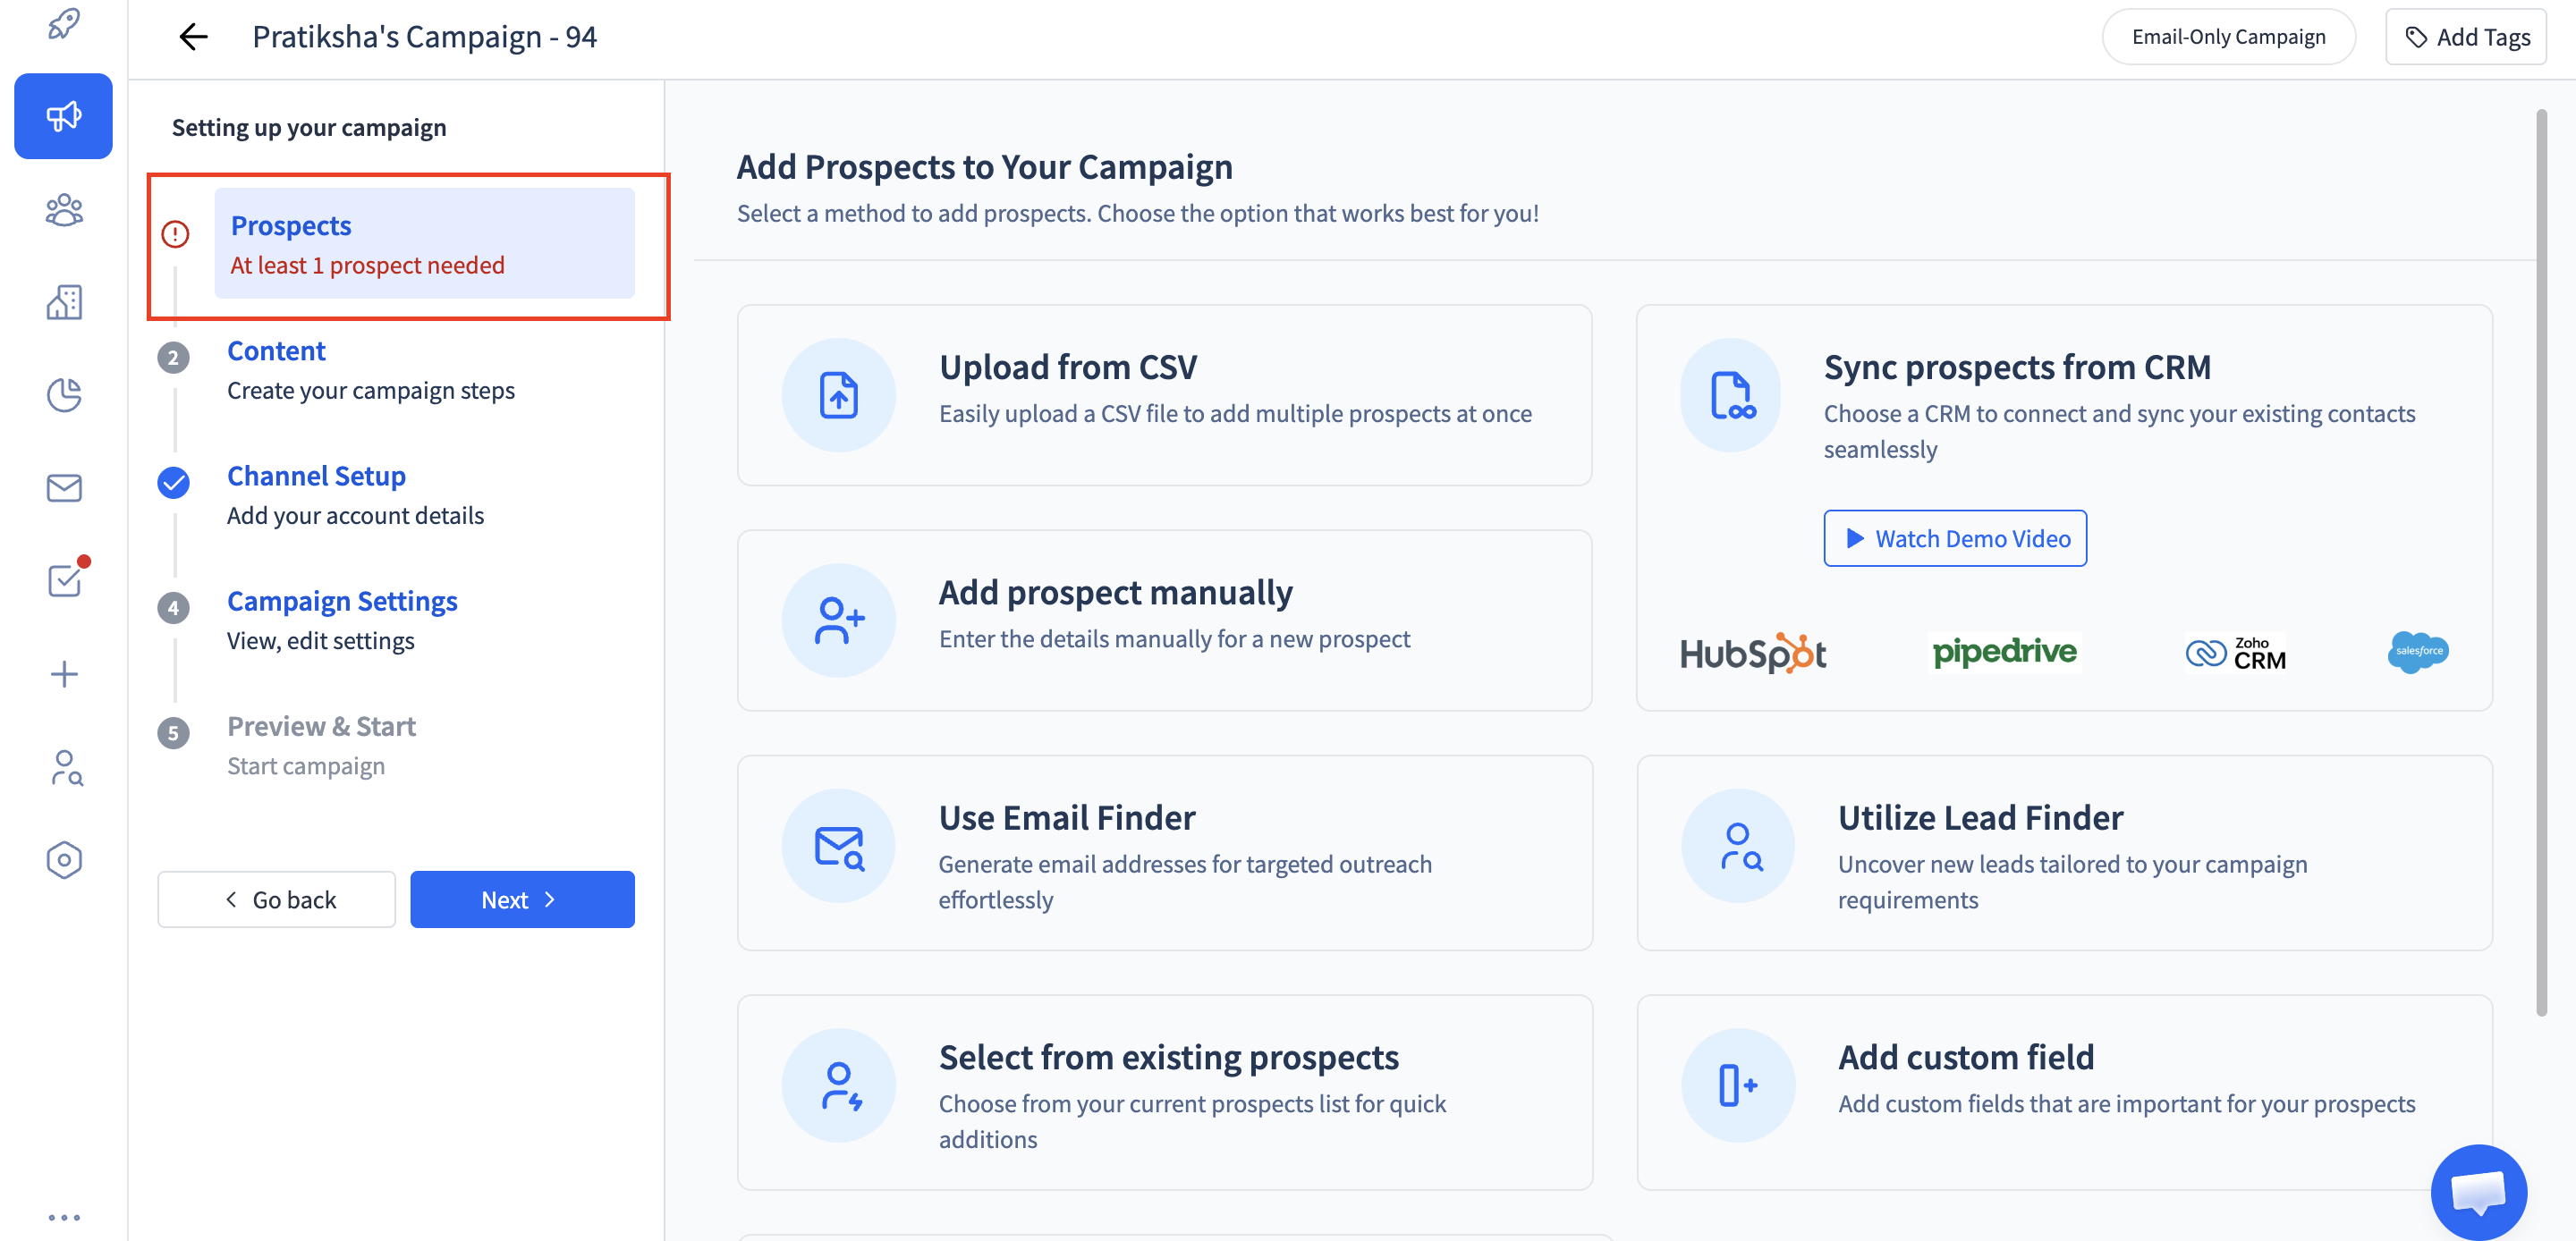
After creating a campaign, you will be redirected to the prospects page. You can also upload prospects by going to the main Prospects page on the top header, or in an existing campaign by going to the Prospects tab.
Click Here to get the more information about how to upload the prospect via csv
Step 1: Click on Upload from CSV
Step 2: If you have doubts about the CSV file format just click on the Sample CSV file download.
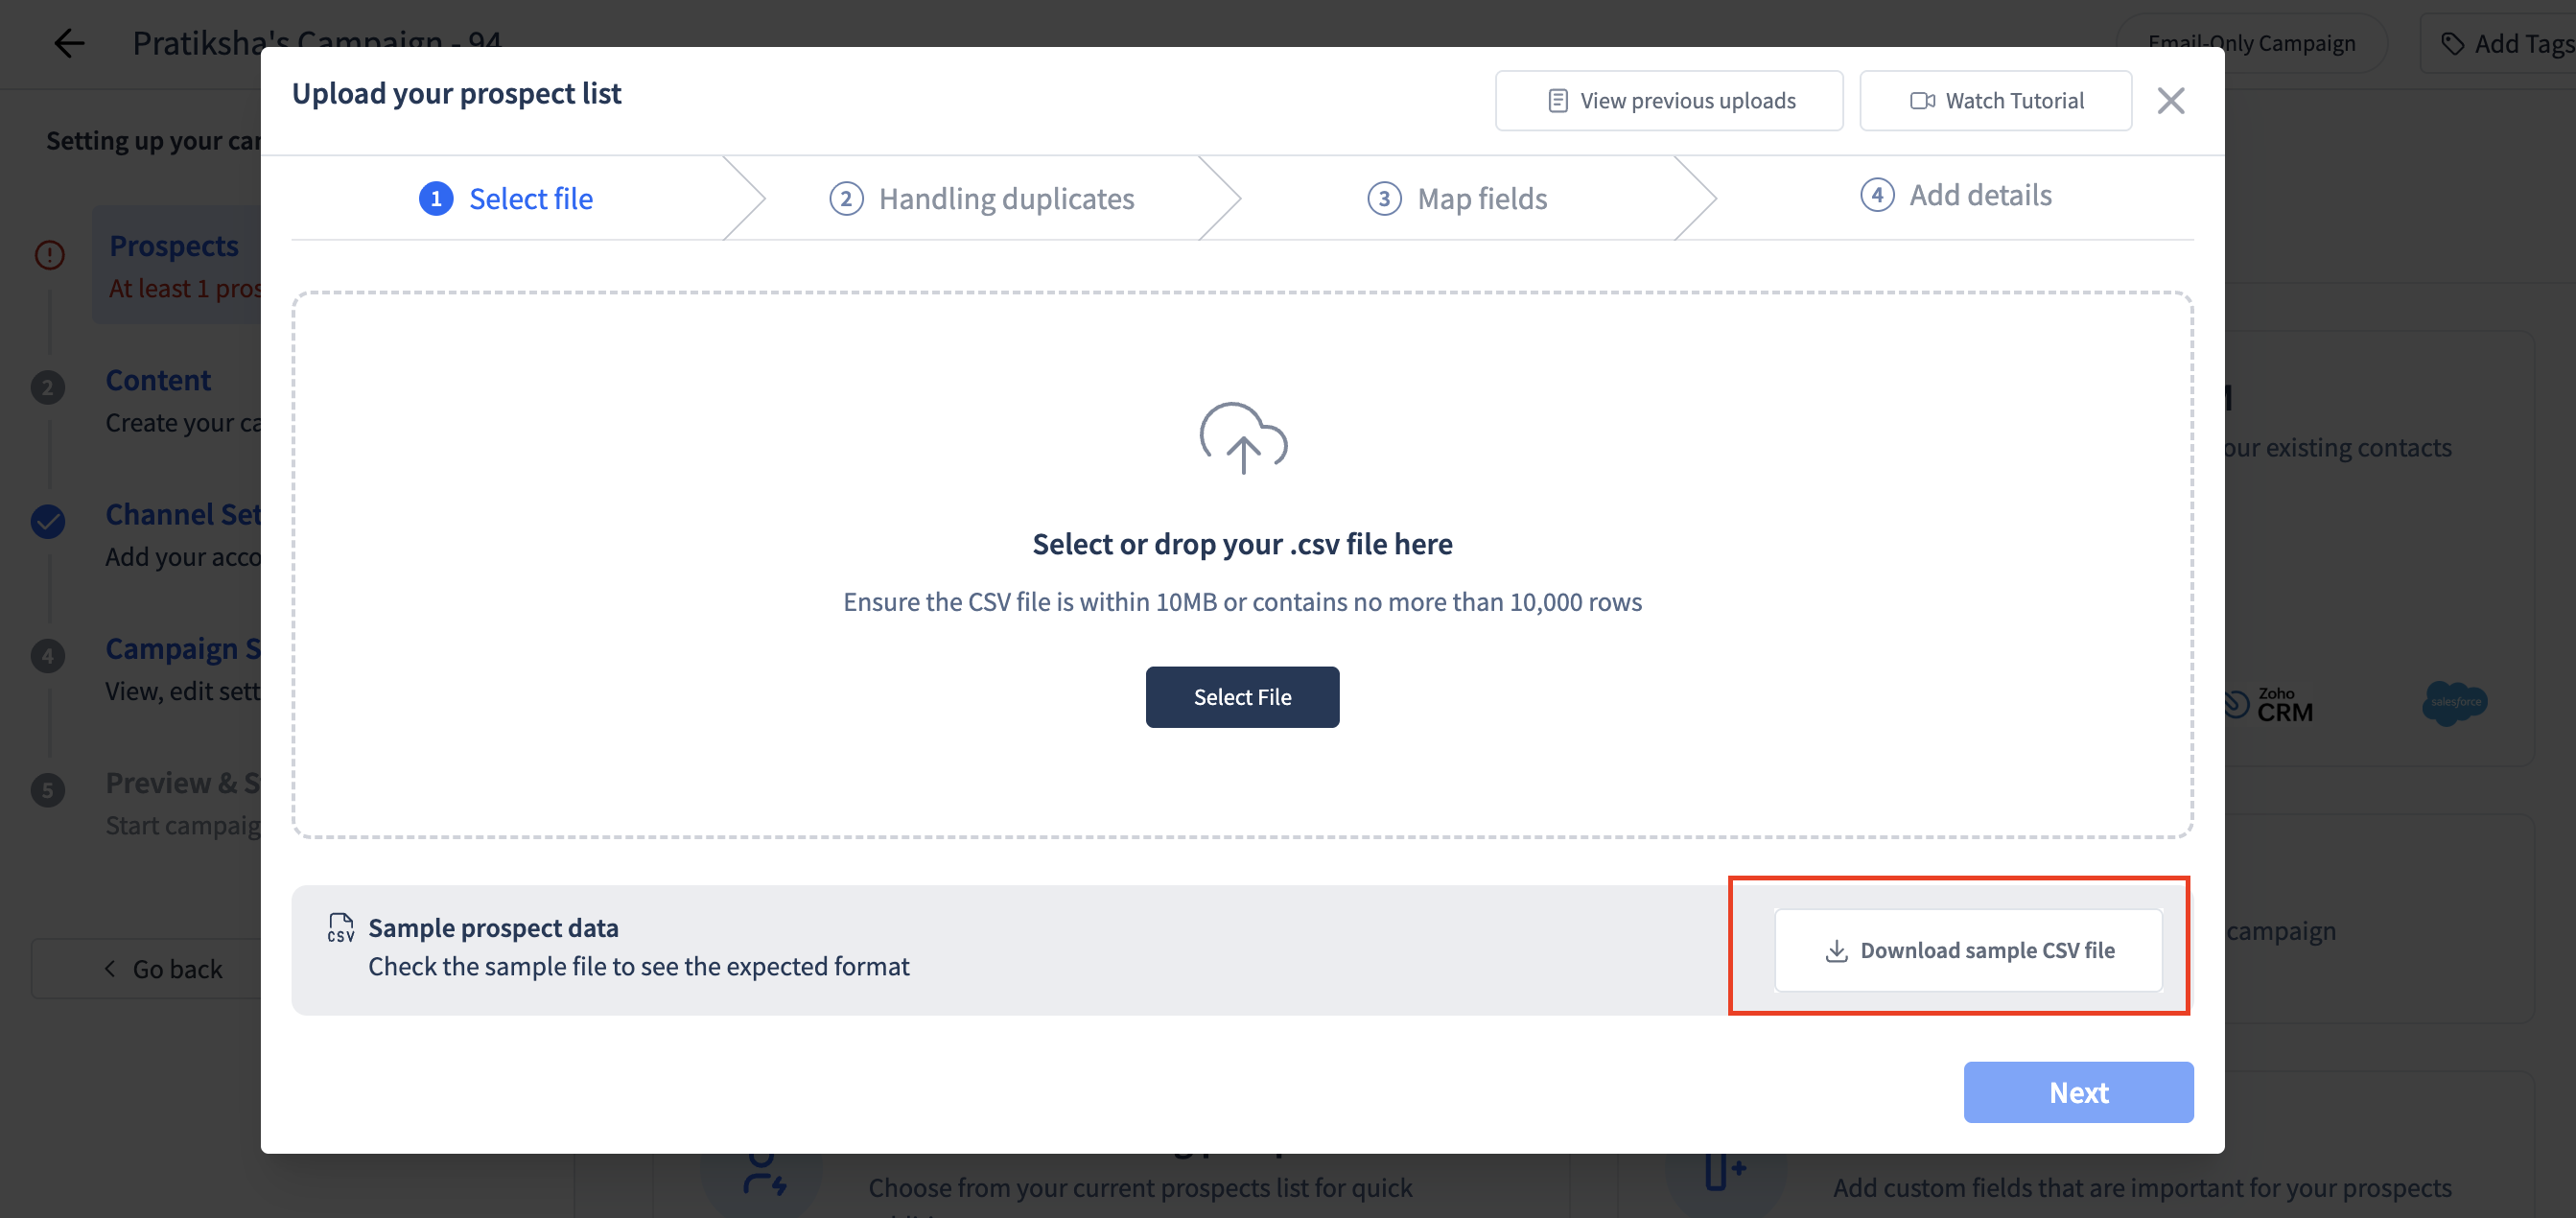
Step 2 - a: Click on Select file and browse to the file path of the CSV from your local storage, or simply drag the CSV and drop it in the shaded region, then click Next.
NOTE: Check for blank columns, empty column headers, etc in your CSV file, if you have such kinds of fields in your CSV file, the upload will fail. Remove those errors and then you are good to go.
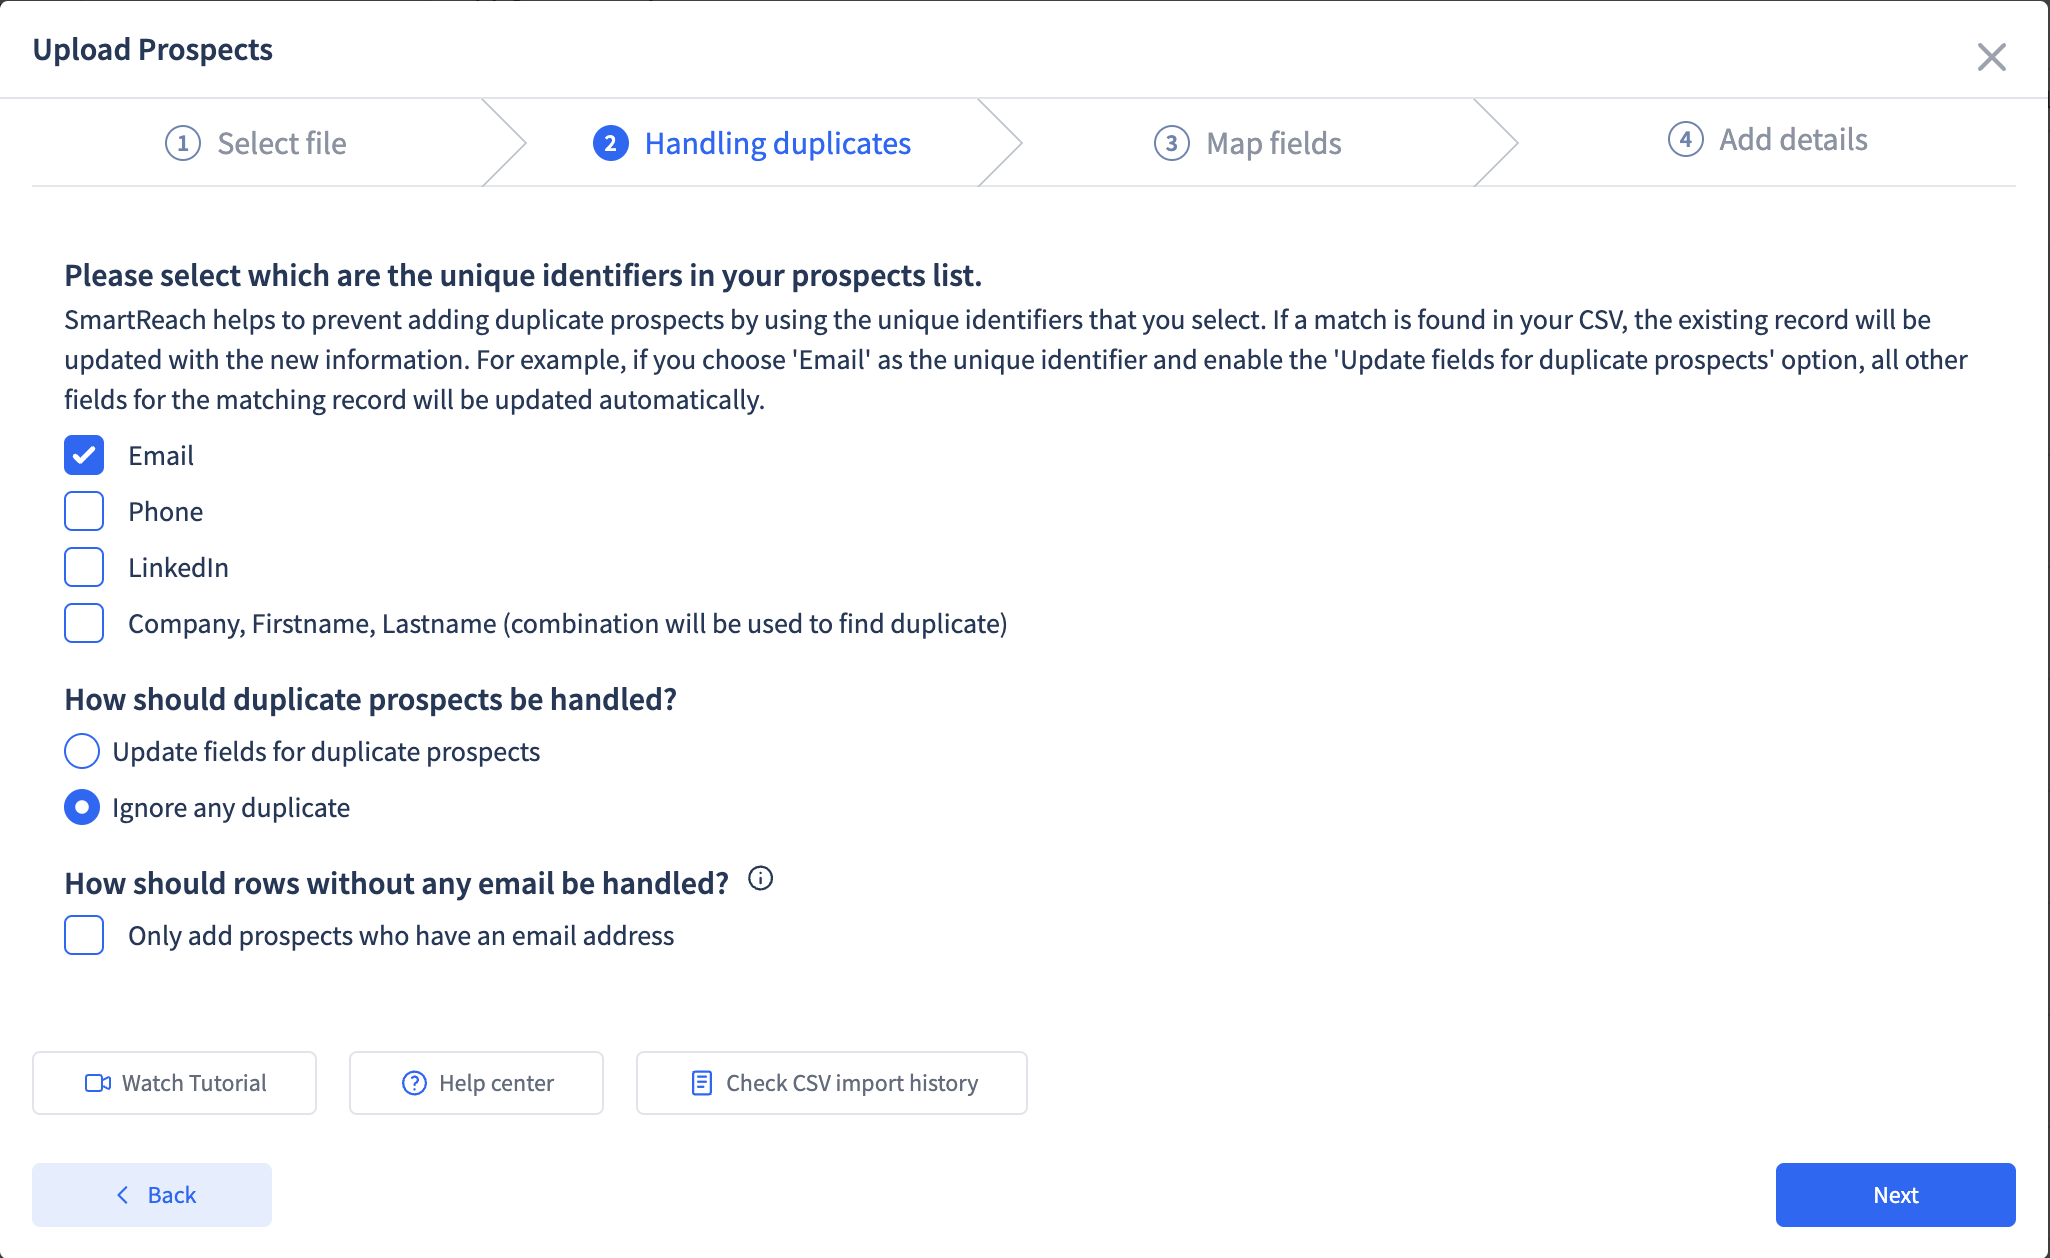
Step 2 - b Next, decide how you want to manage duplicate entries.
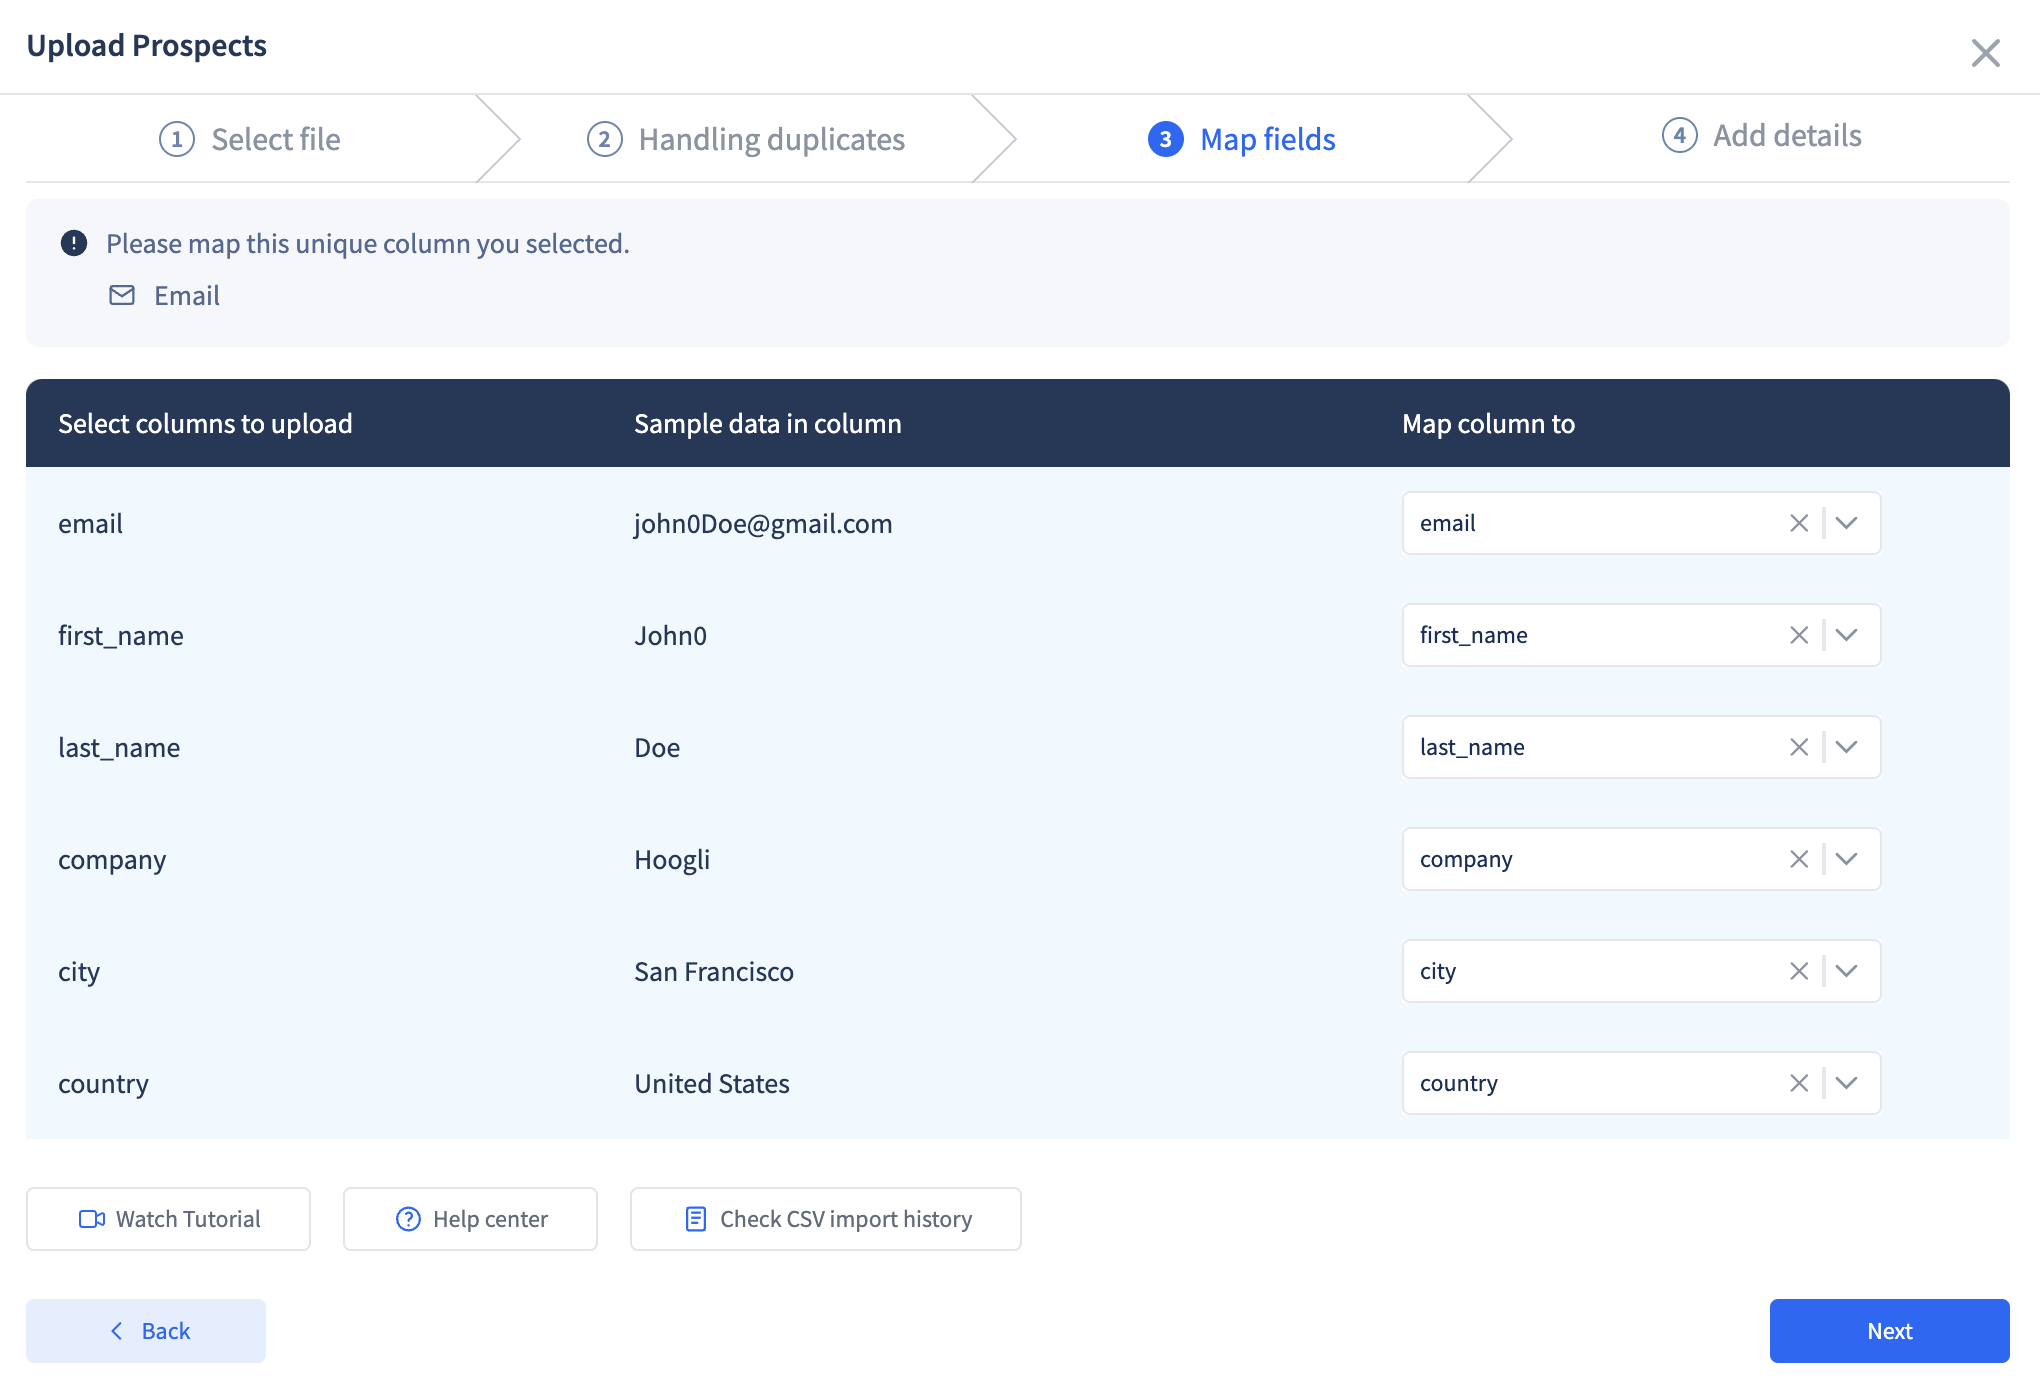
Step 2 - c: Map the fields in the CSV file to the fields in the SmartReach.io form
Note: If there are fields in the CSV that do not match, you can create a new column to assign the column in the CSV to the column in the form.
Step 2 - e: Add the prospects to an already existing list or type in the new list name to add to a new list.
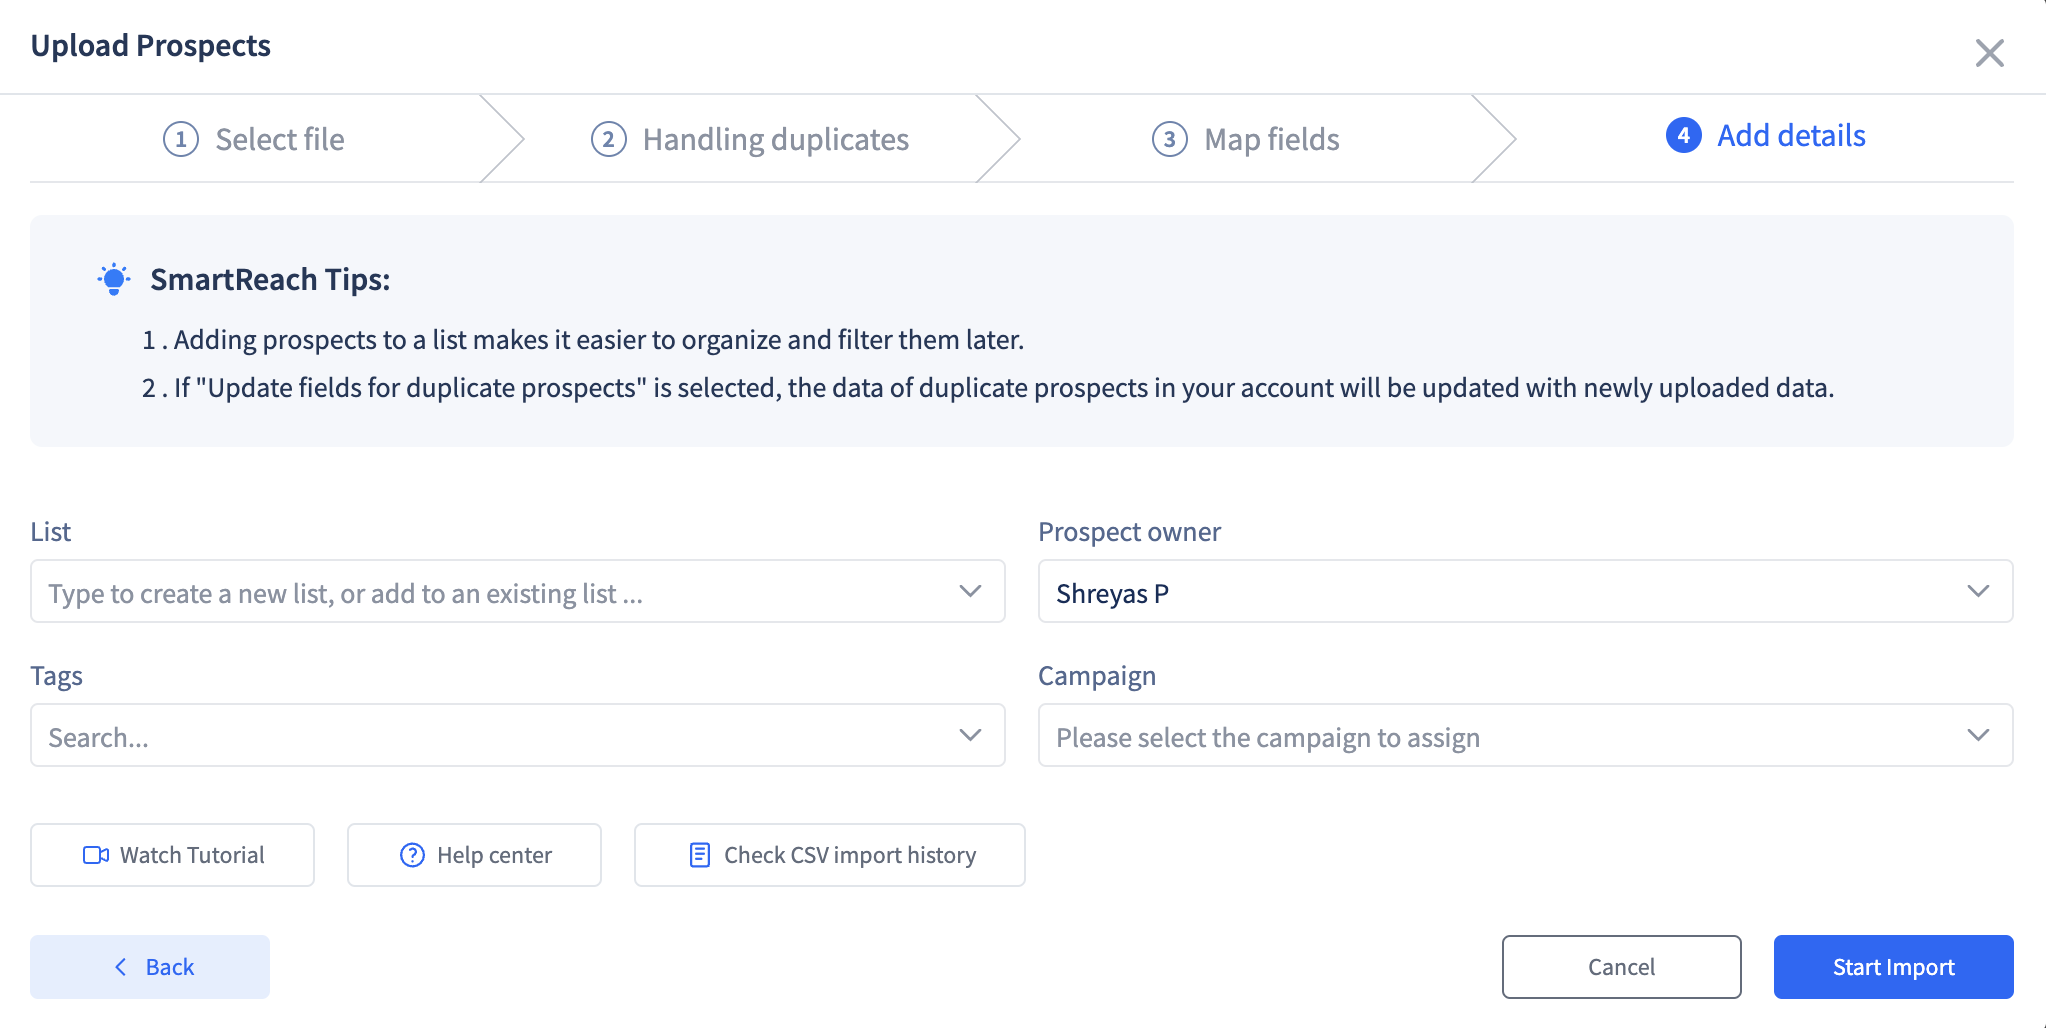
Step 2 - f: Click Upload to check the status of the prospects.
But if the number of prospects is many say more than 100, SmartReach.io would take up to 5 minutes to upload and it would send an email after a successful upload. A notification popup will appear in the bottom left of the screen once an upload is done.
And an email will be sent as shown below.

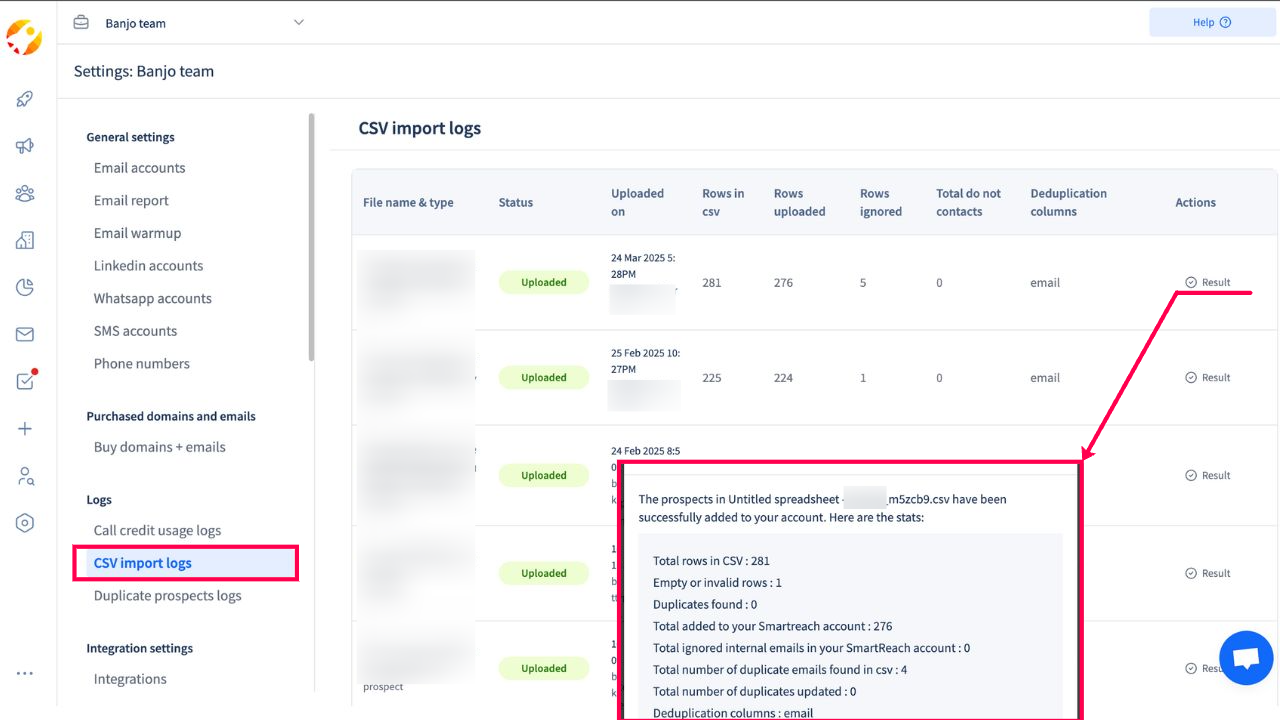
Check your csv upload history
Step 1 - Go to Team setting
Step 2 - From left side panel click on CSV import logs
Step 3 - To view the report click on Result for respect CSV file, from the table
Updated 4 months ago