Clay Integration
Connect Clay.com data enrichment platform to SmartReach for personalized cold email campaigns. Step-by-step HTTP API integration guide.
What is Clay.com?
Clay.com is a data-enrichment platform that helps businesses build personalised outreach by connecting with multiple data sources. It enables teams to gather insights on prospects, find relevant information, and create tailored outreach campaigns with ease.
How does Clay.com work?
Clay.com simplifies prospecting by collecting and organising data from sources like LinkedIn, social media, and company databases. It enriches profiles with accurate and detailed information, enabling businesses to integrate this data into their outreach tools. This streamlined approach allows for crafting personalized campaigns that boost conversion rates, while its automation features save time by minimizing manual effort in data gathering and verification.
What are the integration requirements for Clay.com?
Active Clay.com Account: You need an active Clay.com subscription to enable the integration.
Here are the steps to connect SmartReach with Clay
-
In Clay, click on Add Enrichment and search for "http"
-
Select Clay Http API
-
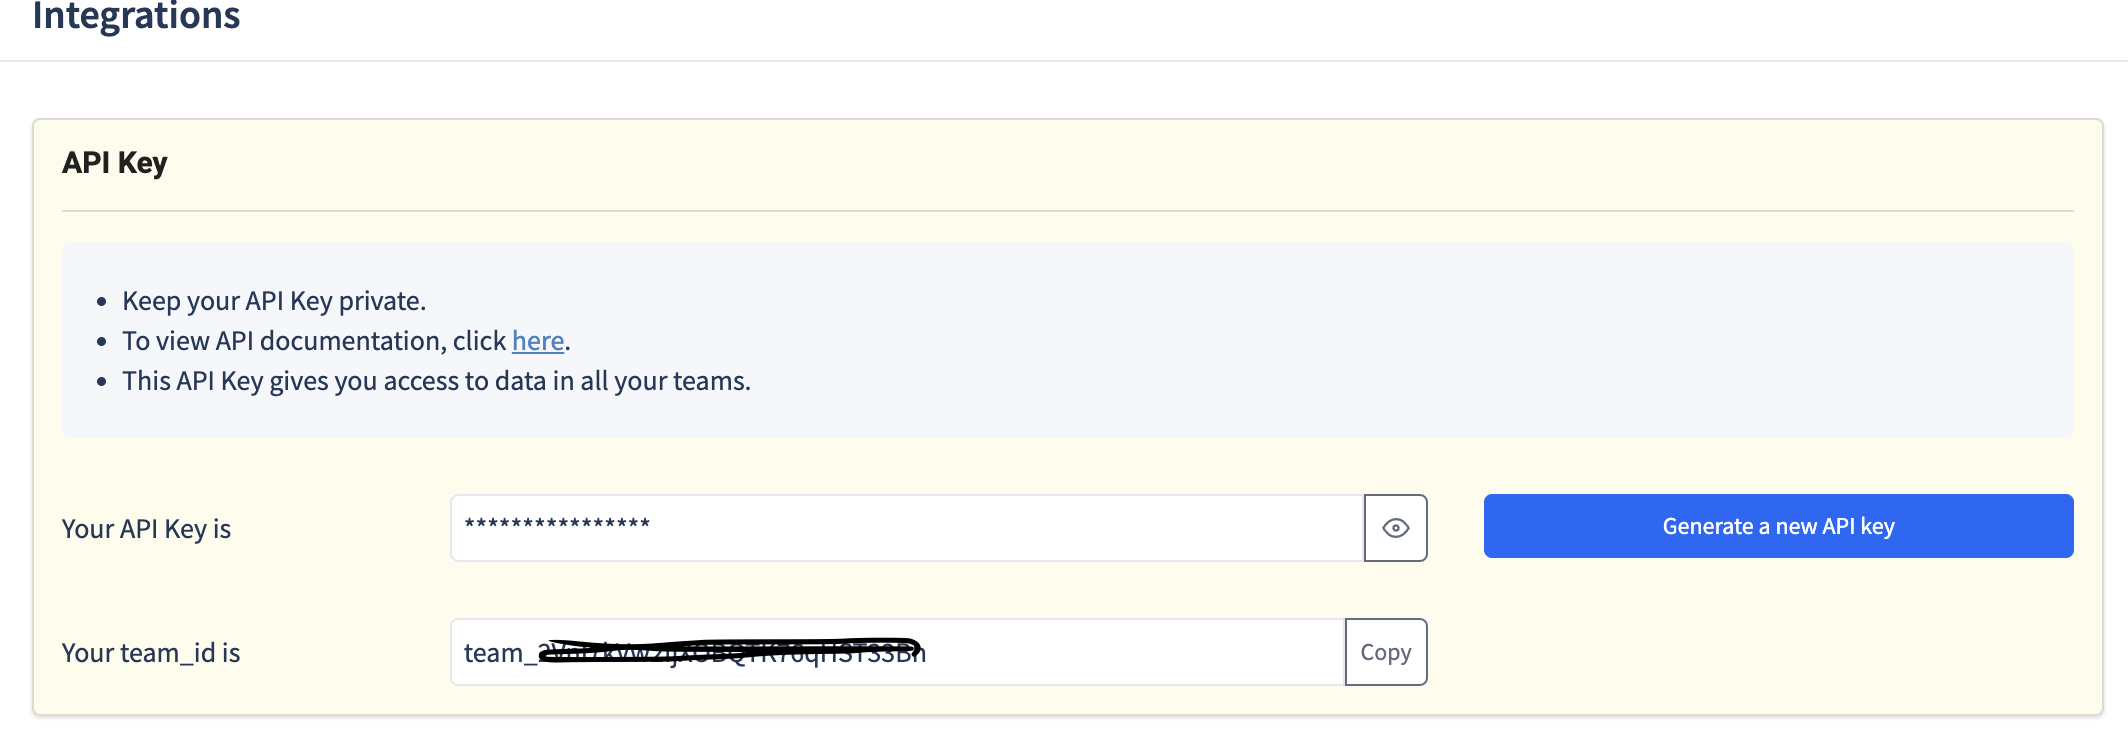
Three API keys need to be set up on Clay to establish the SmartReach connection. You can get these keys from your SmartReach web app.
-
User-Level API Key Found under Team settings > Integrations > Your API key is
-
Team ID Found under Team settings > Integrations > Your team id is
-
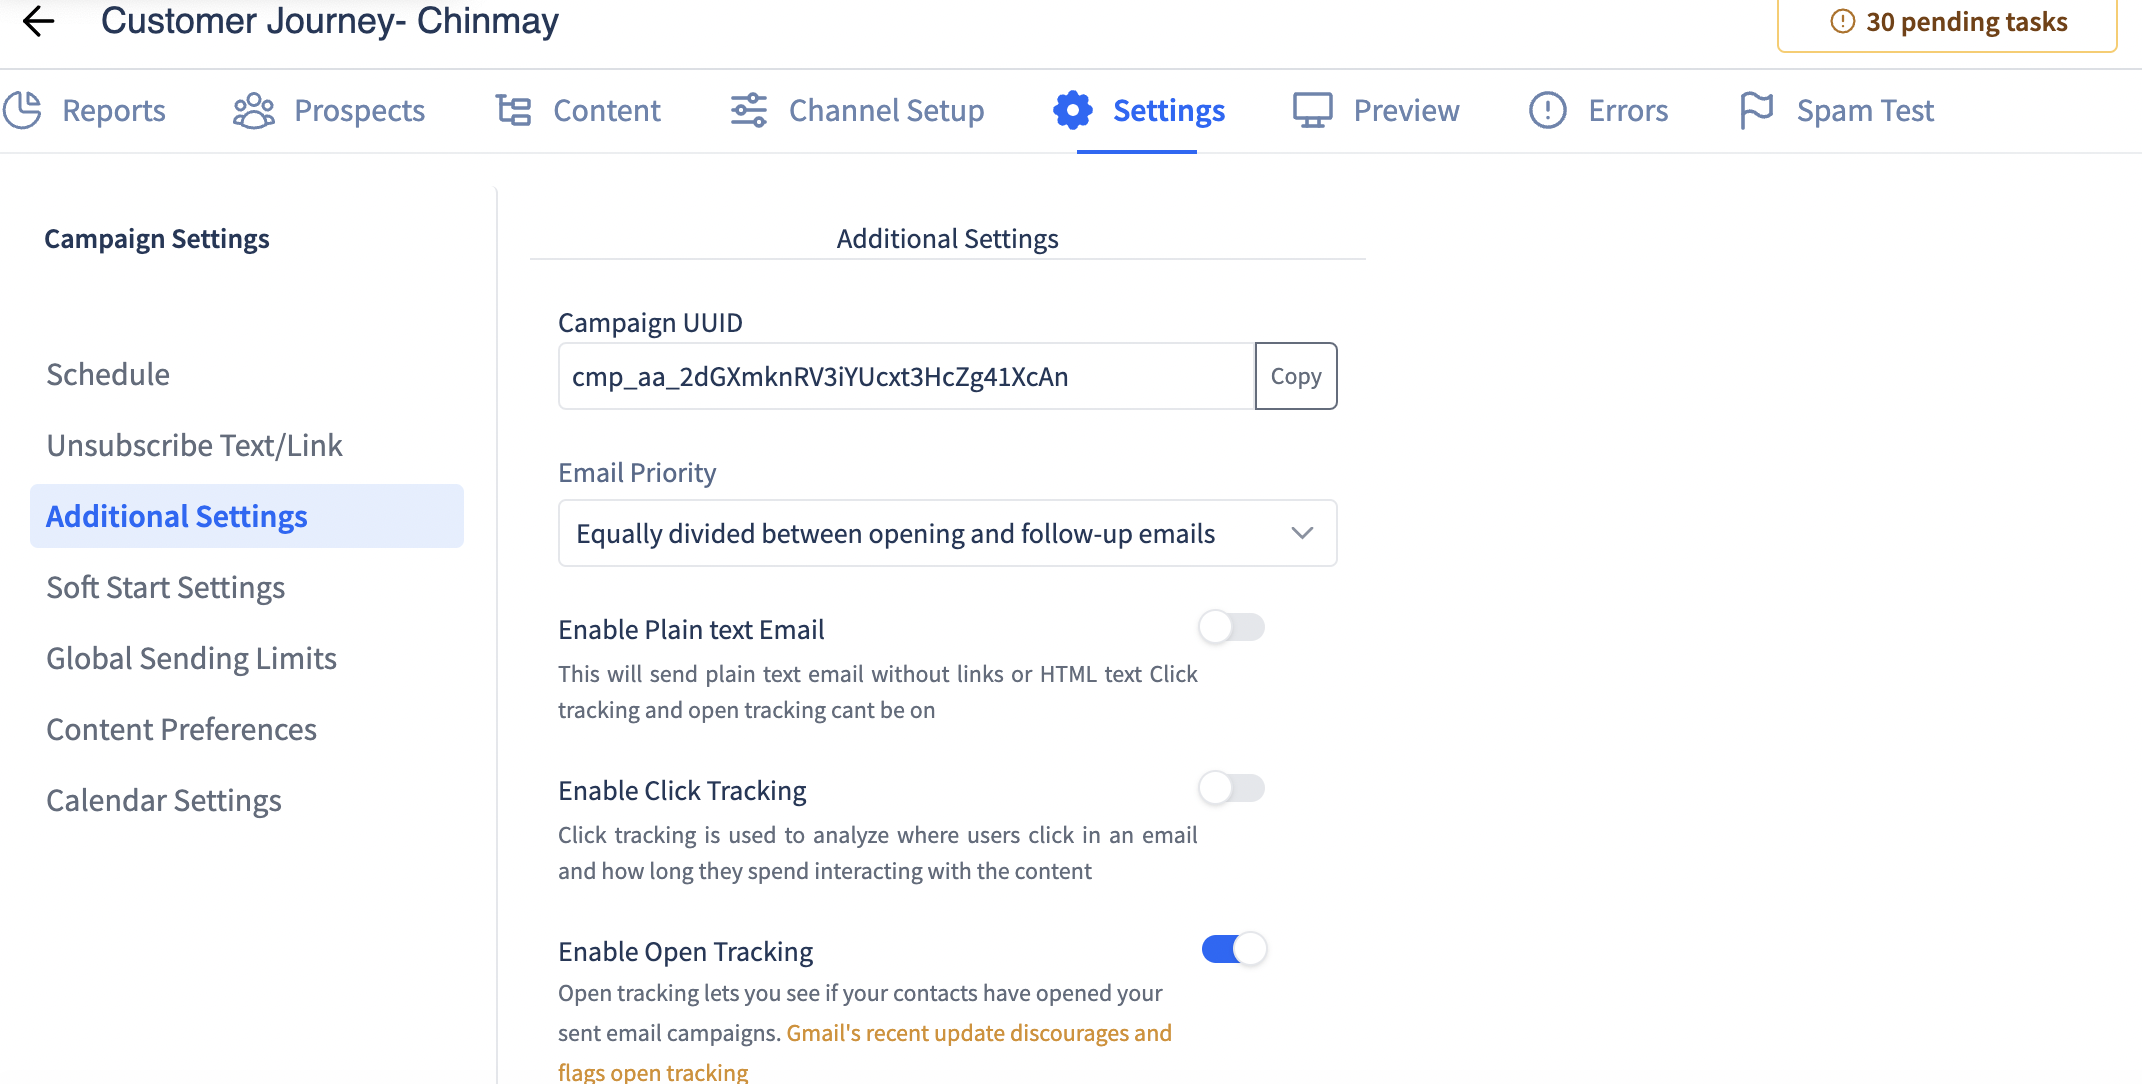
Campaign ID Navigate to your Campaign, then go to Settings > Additional Settings
-
-
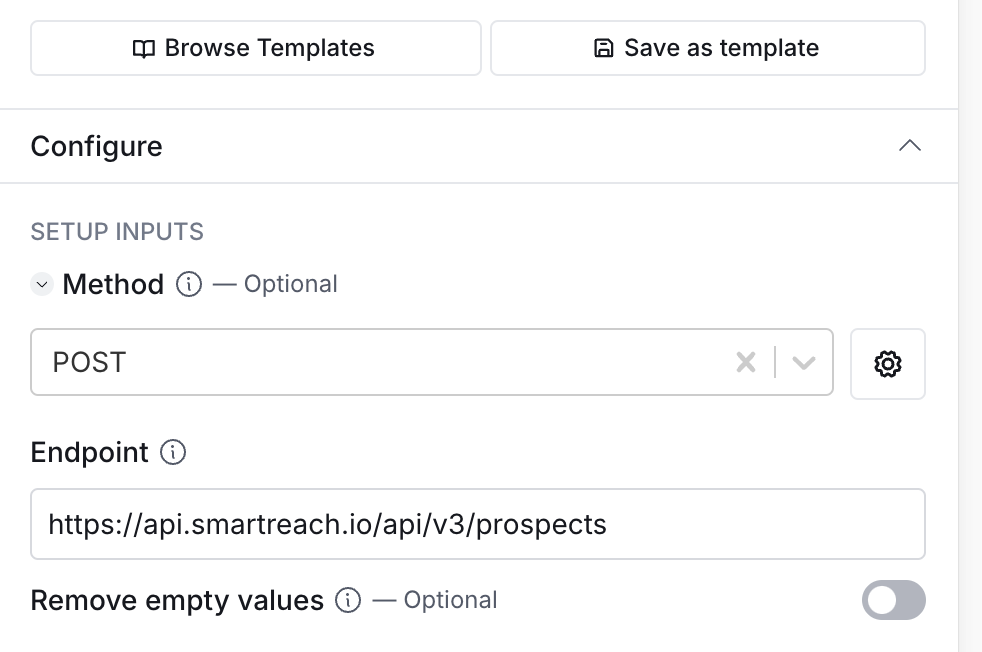
In Clay http API under Configure , Set this up:
-
Choose Method: POST
-
Enter the Endpoint as: https://api.smartreach.io/api/v3/prospects
-
-
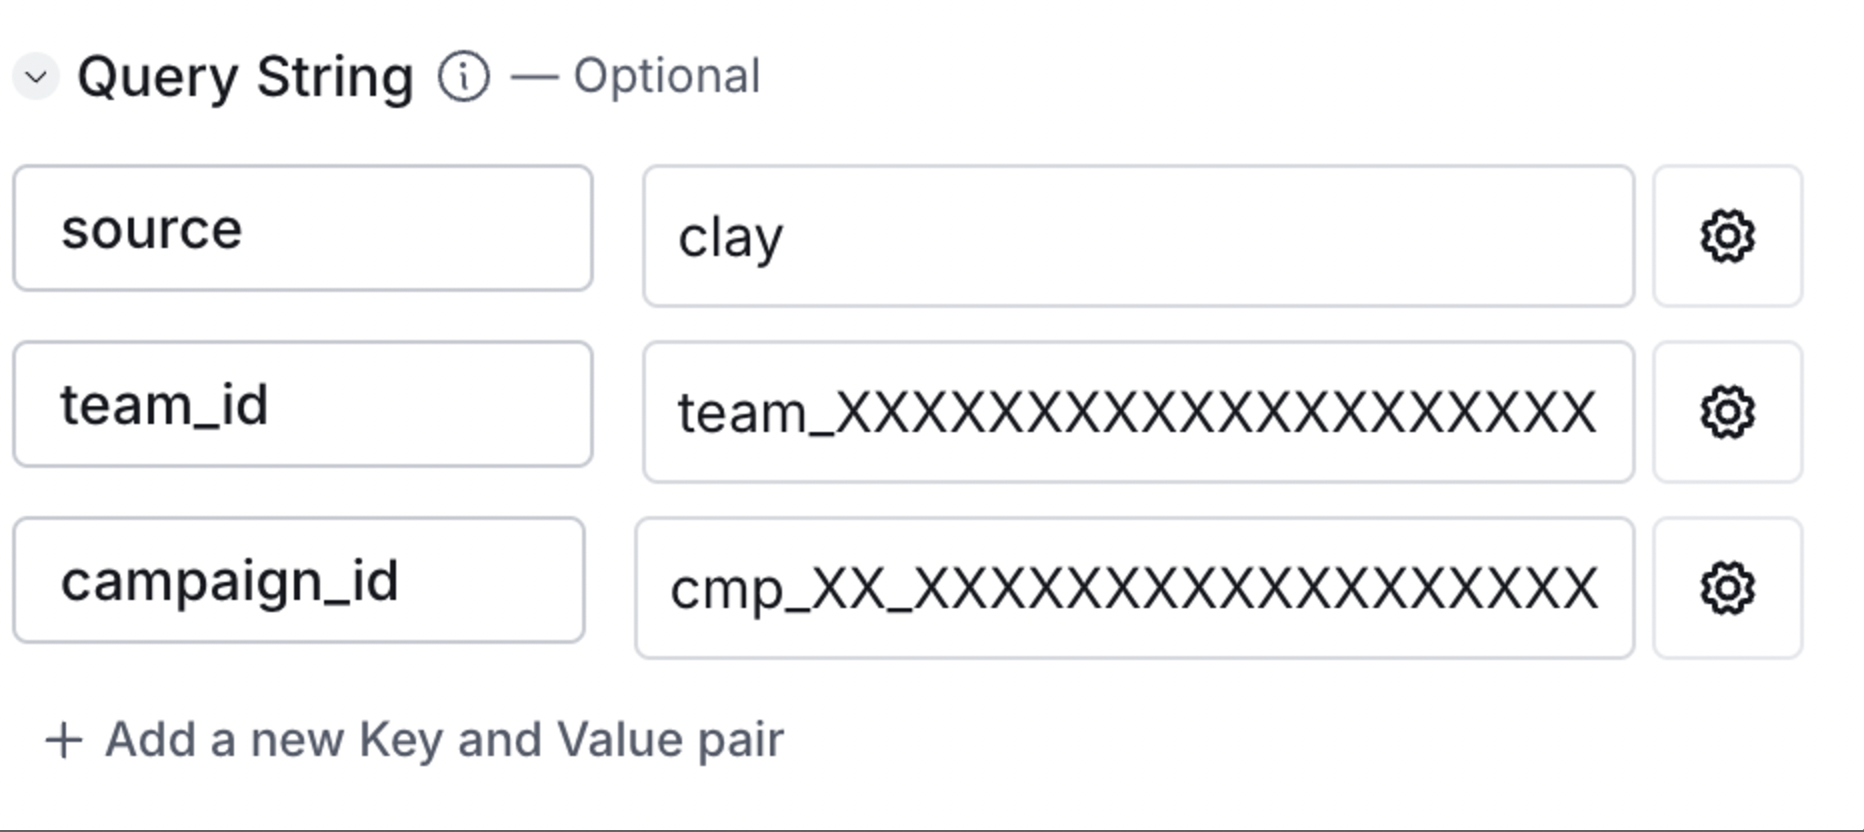
Under Query String Enter the fields as follows
-
source: clay (c in lower case)
-
team_id: Enter the Team Id from SmartReach which starts with team_
-
campaign_id: Enter the Campaign Id from SmartReach which starts with cmp_
-
-
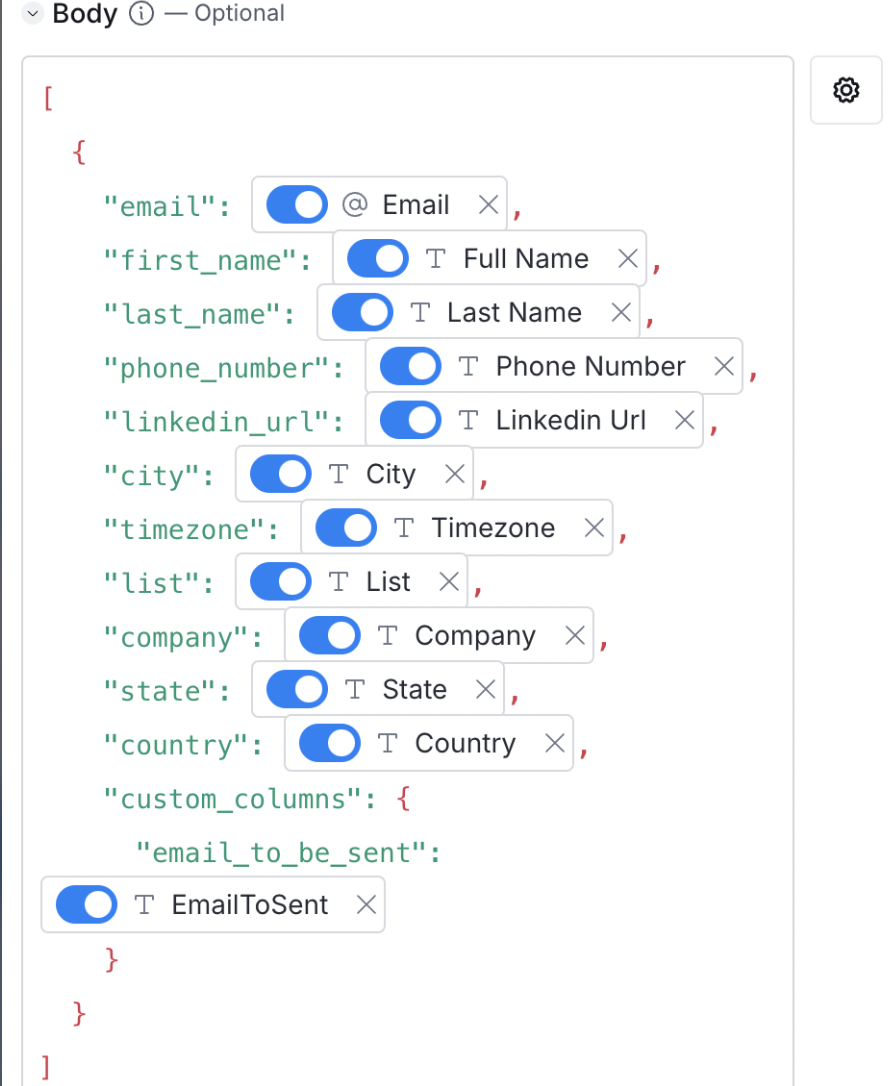
Under the Body Map Fields like this
-
Map the default fields on Clay table with the prospect fields as shown below
-
Default Fields: Map standard fields such as First Name, Last Name, Company, Email, etc., directly at the primary level.
-
Custom Fields: Define custom fields in both SmartReach and Clay. Use the format demonstrated in the screenshot. Example: For a custom field named "Response," ensure it is created in both SmartReach and Clay.
-
Important Note Custom fields must be added in both platforms; otherwise, they will not update correctly
-
-
-
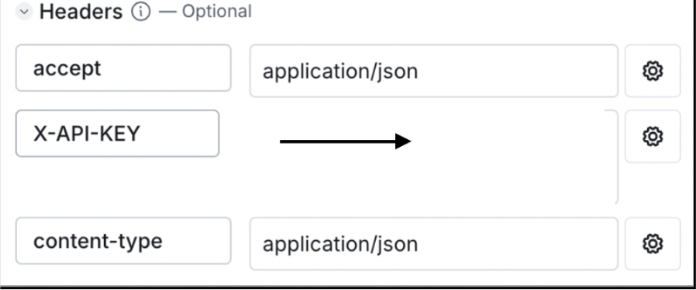
Enter the Header Field as shown below
-
accept: application/json
-
X-API-KEY : Enter the user level key that was taken from SmartReach which starts with uk_
-
content-type: application/json
-
-
Once the integration is complete, you can run the enrichment on clay. If you receive a "200 Response" it implies that the integration was successful.
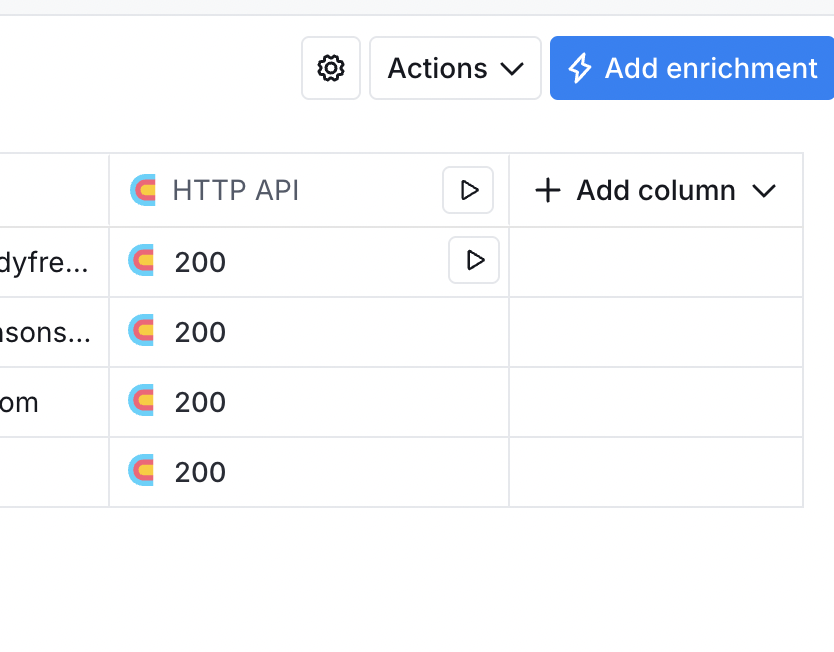
Please note If the integration doesnt go through, please ensure that you are using the formula as JSON.stringify while mapping of fields in Clay.
Updated 6 months ago