Setup Mailgun
Configure a new domain in Mailgun with DNS records for cold email campaigns. Complete setup guide for SPF, DKIM, and MX records.
SmartReach.io lets you integrate with various mail boxes. Apart from these you can also integrate with SMTP mail servers like Mailgun and Sendgrid.
With SMTP servers like Mailgun and Sendgrid, you would need some additional steps to integrate your domain with Mailgun.
Creating a new domain on Mailgun:
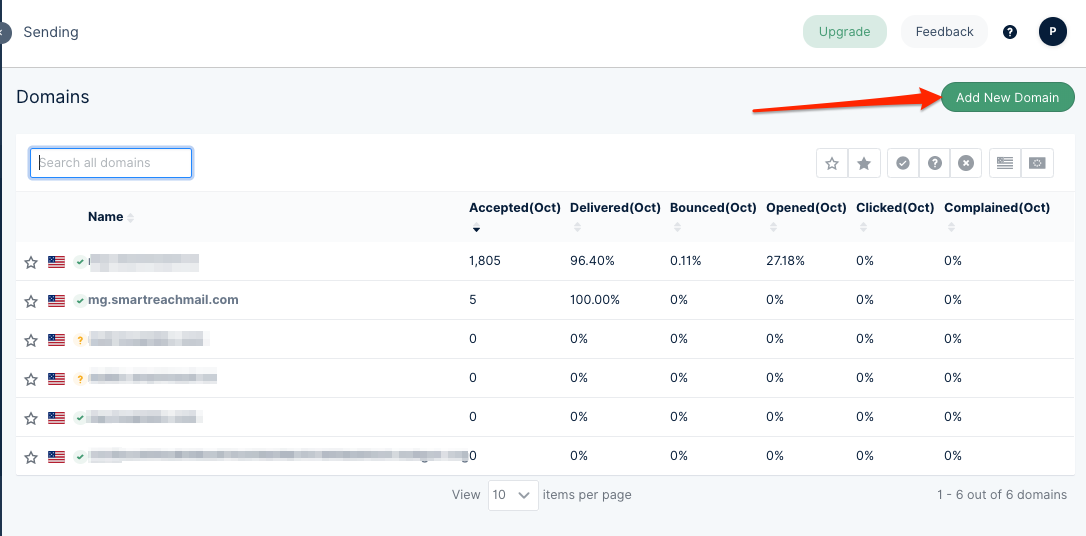
Step 1: From Mailgun dashboard, in the sidebar, go to --> Sending --> Domains --> click on Add New Domain.
Step 2: Type your domain as shown in the form --> mg.yourdomain.com
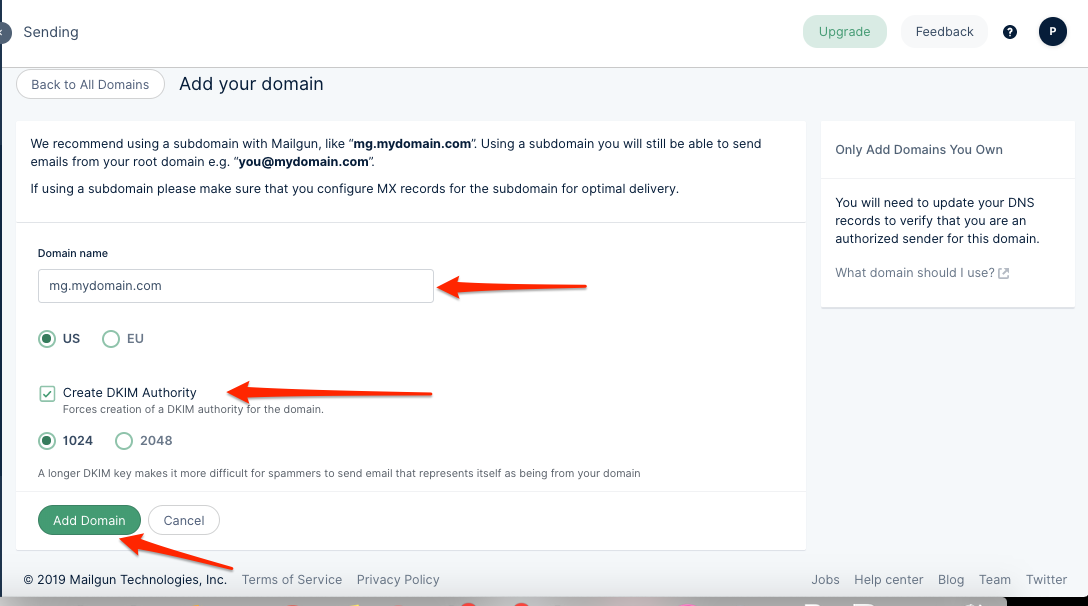
Step 3: Checkmark the Create DKIM Authority button.
Step 4: Click on Add Domain button.
Setting up your DNS records:
You will need access to your DNS manager account (GoDaddy/BigRock account)
Find DNS records in Mailgun and adding the DNS values:
Step 1: From your Mailgun goto Sending --> Domain Settings --> DNS Records
Step 2: Copy the hostname and value of each TXT record.

Step 3: Now Open your DNS manager and create new TXT records and add the values of SPF and DKIM records in your DNS manager.
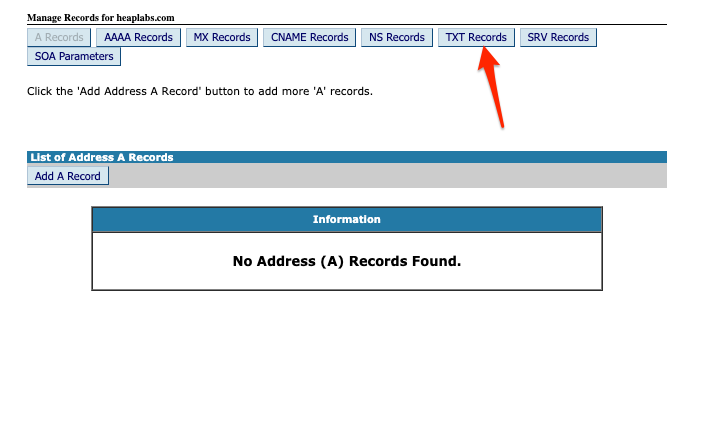
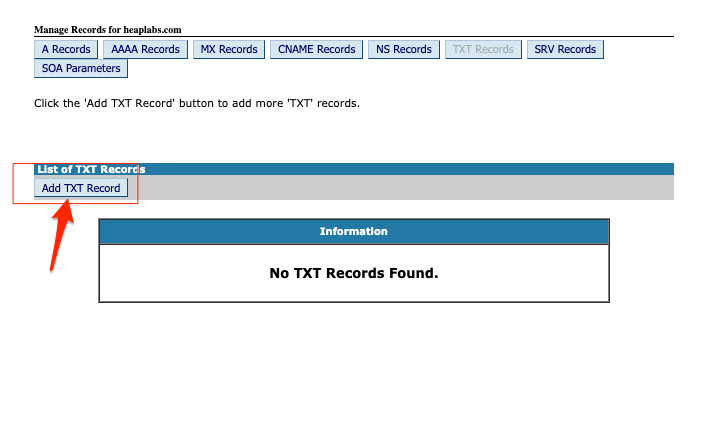
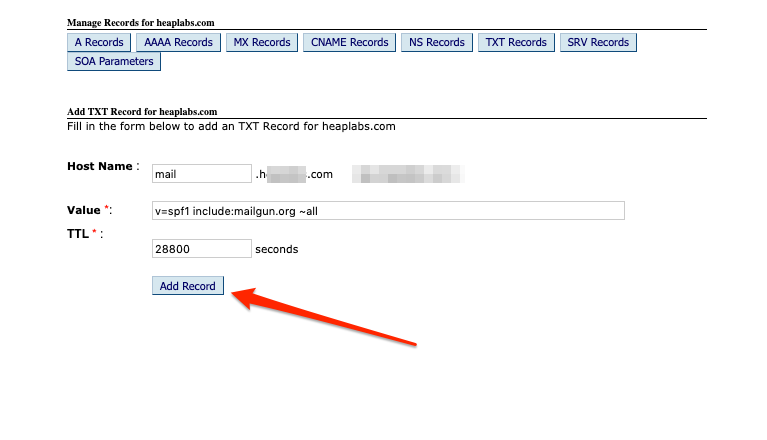
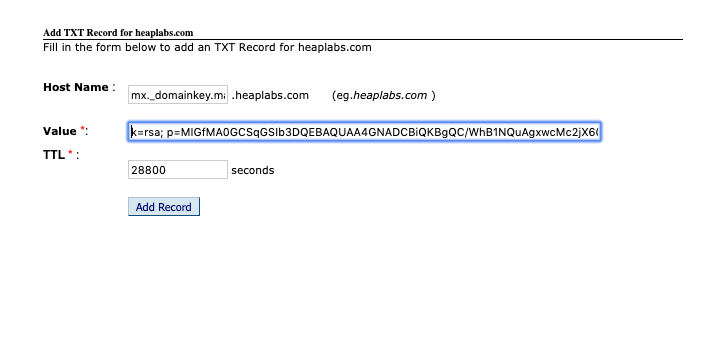
Step 4: After adding your SPF and DKIM , you must add MX records to your DNS. You can only skip this step if you already have MX records for the domain pointing towards another mail service like gmail.
In your Mail gun account under DNS Records, you will find MX records:

Open your DNS manager and create MX records and add the above values there
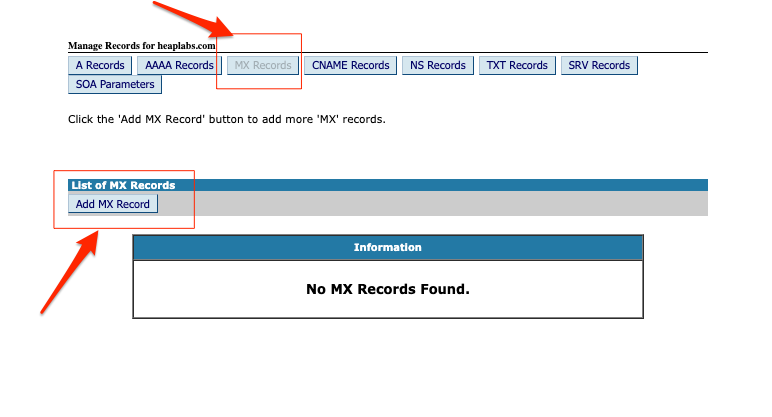
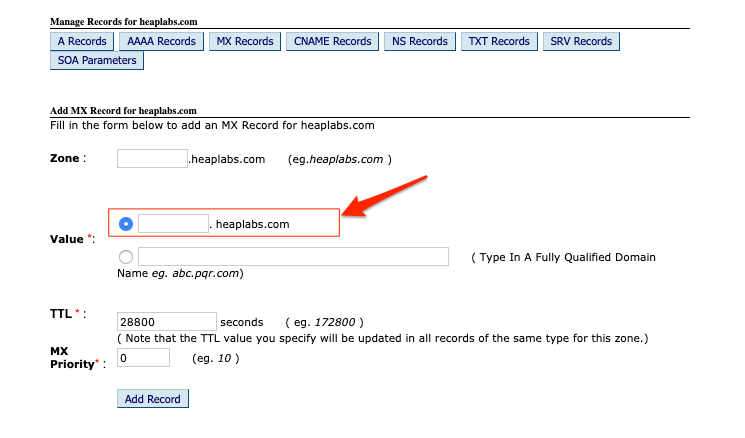
Step 5: Save those changes. It will take 24 to 48 to propagate your DNS records. In your Mailgun account under the DNS settings you should be able to see the current values.
Step 6: If the values match, Click on verify your DNS settings.

*Important Note: When you are integrating your Mailgun inSmartReach.io account do not enable custom tracking on Mailgun account.
Updated 7 months ago